I worked with a great online florist called The Bouqs on this post. I used their company to send one of my friends a bouquet recently (they have a promotion right now where you get a free bouquet with your first order!) and she was super impressed and begged to find out where I could find such pretty ranunculus at this time of year. The Bouqs ships their flowers directly from their sustainable, eco-friendly farms on the side of active volcanos (!) in Equador right to your door, so the buds are always fresh and so beautiful!
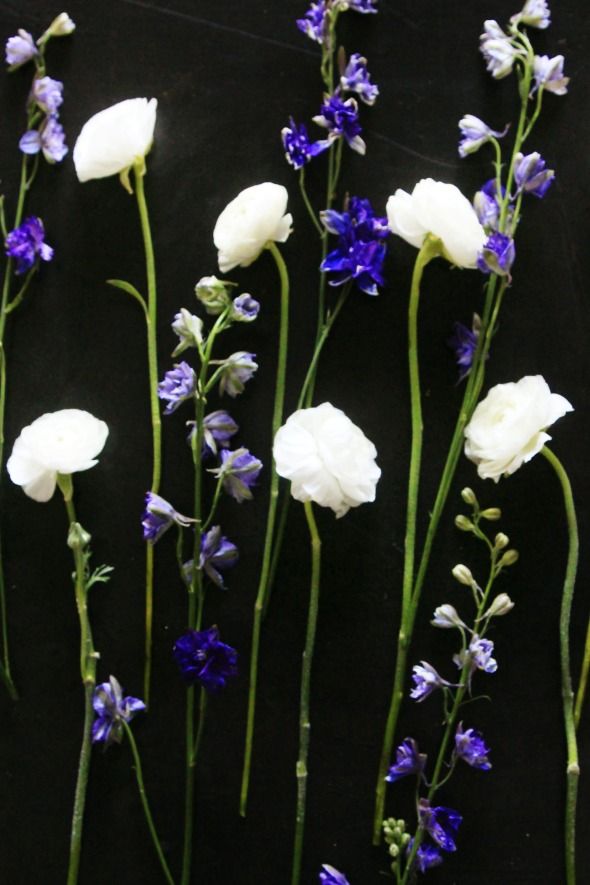
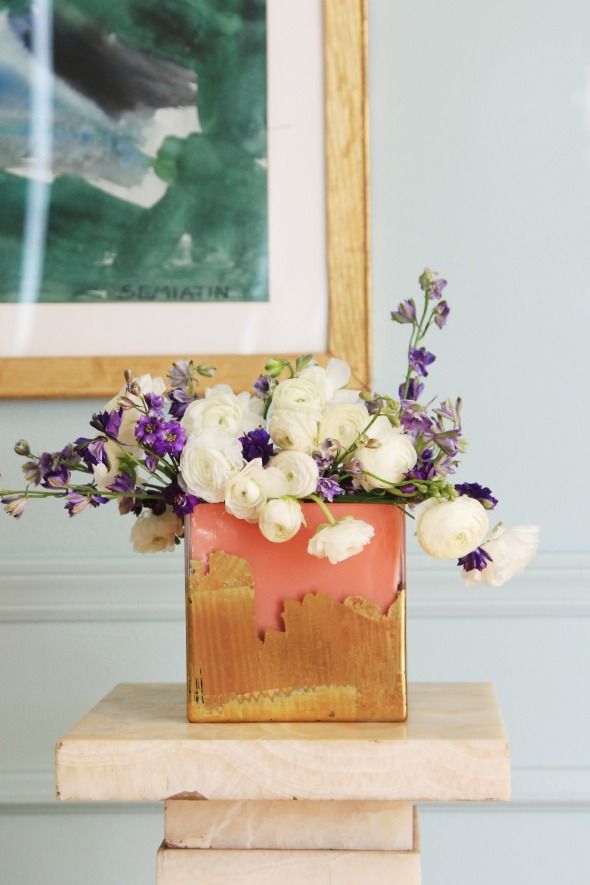
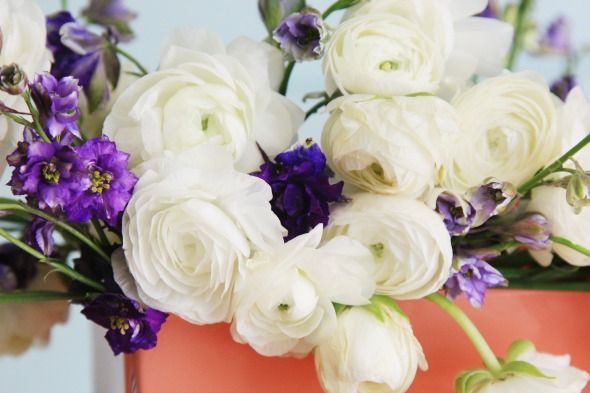
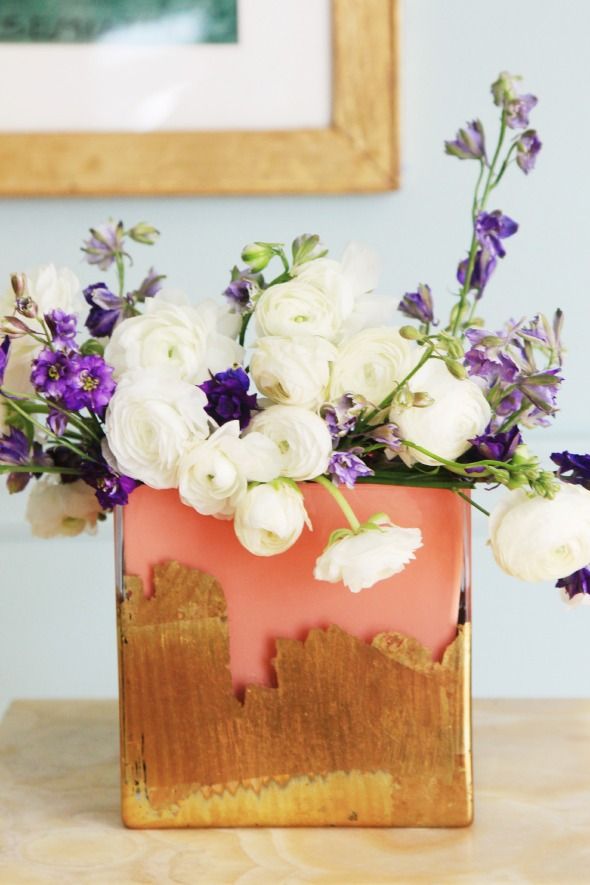
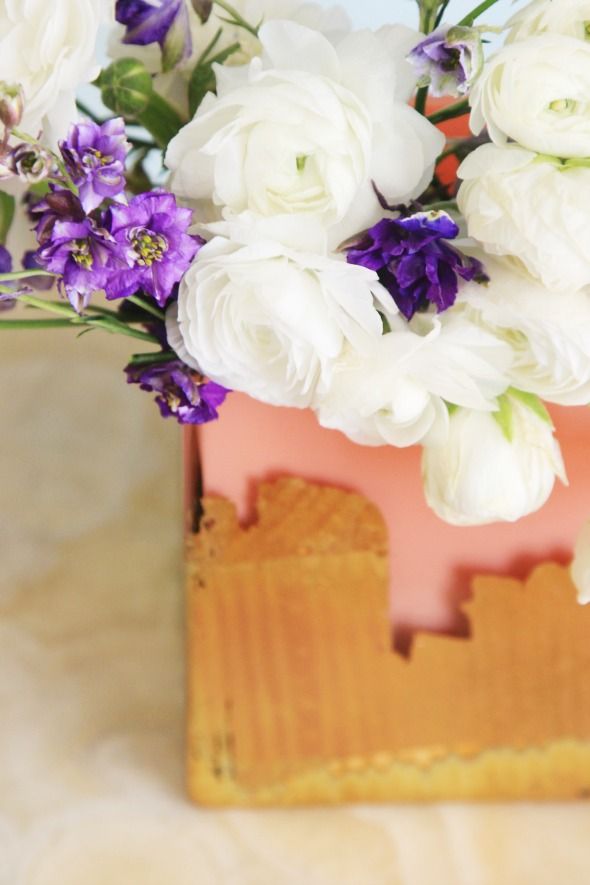
There's no silly teddy bears or weird upselling, just beautiful flowers at great prices and always free shipping. It's a perfect solution for when you want to send thinking-of-you flowers to your friends, but you don't really want to spend a ton of money on a dumb arrangment. These flowers are from the Marshmallow bouquet (one of my favorites on their site). I love how the bright white buds pair with the pretty purple larkspurs and the coral color of the DIY vase.
To do the quick and easy leafing project, I picked up a couple of clear glass vases at the craft store, cleaned them well, and taped the entire outside of the vase with painters tape before spray painting the insides.

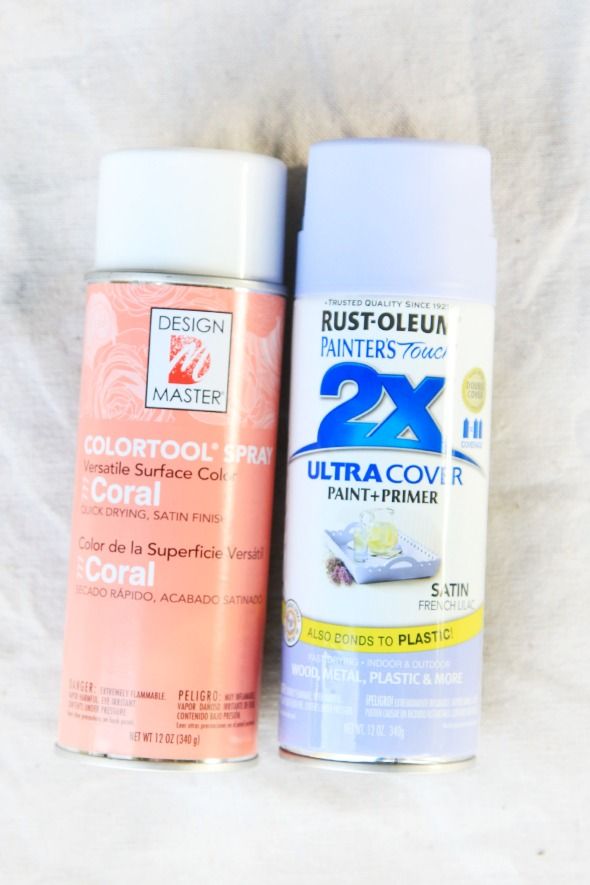
I used Rustoleum's French Lilac (can't get enough of that one!) and Design Master's Coral. I sprayed on a couple of very, very thick coats and let the paint dry for at least 12 hours.
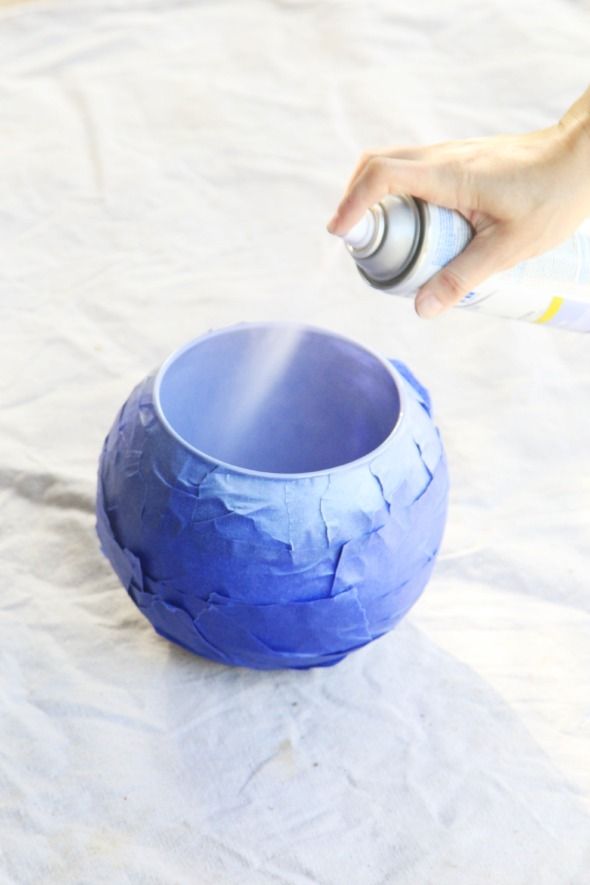
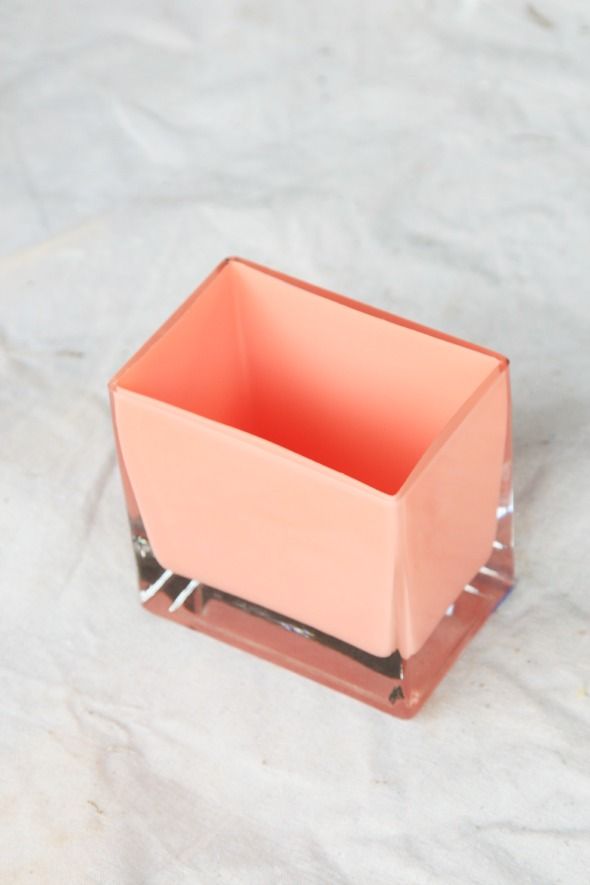
When the paint is dry and the tape is removed, the paint looks like milk glass! It's such a pretty effect - I did a similar project here to get a blue opaline look for my jewelry trays.

I wanted to go a step further on this project though and give the outside of the vase some metallic love using the variegated rose gold leaf. Any leafing project can get a little messy (but it will be the most beautiful mess you've ever laid your eyes on!). I like to lay down a sheet of thick brown kraft paper before starting, which makes clean up a breeze.
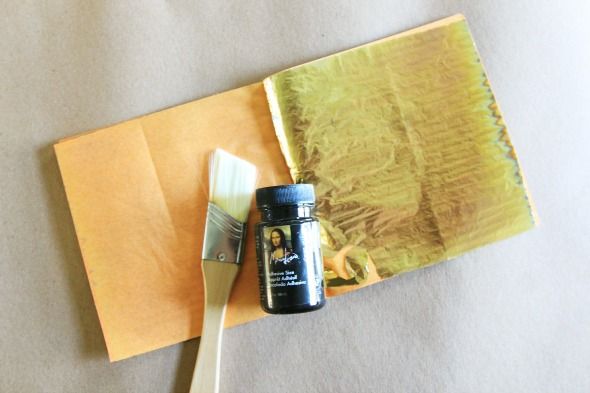
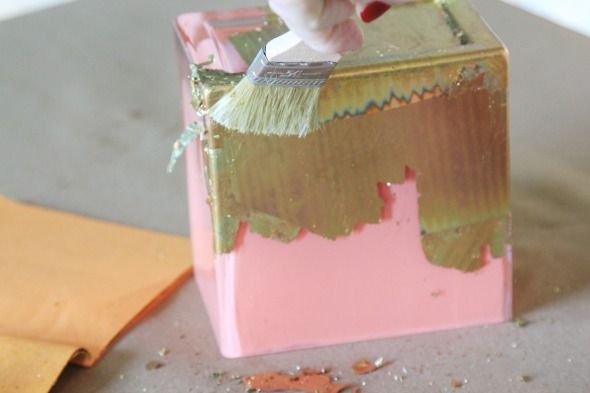
I poured a small amount of leafing size on the top of the vase and used a 1" brush to very loosely paint the size on the bottom half of my vase. I went really easy with the size - being careful to not overly smooth out the brush strokes and to leave little gaps here and there too. As you let the sizing glue dry, watch for drips and either brush them off or lightly dab them up with a paper towel. You want the coat to be thin and even.
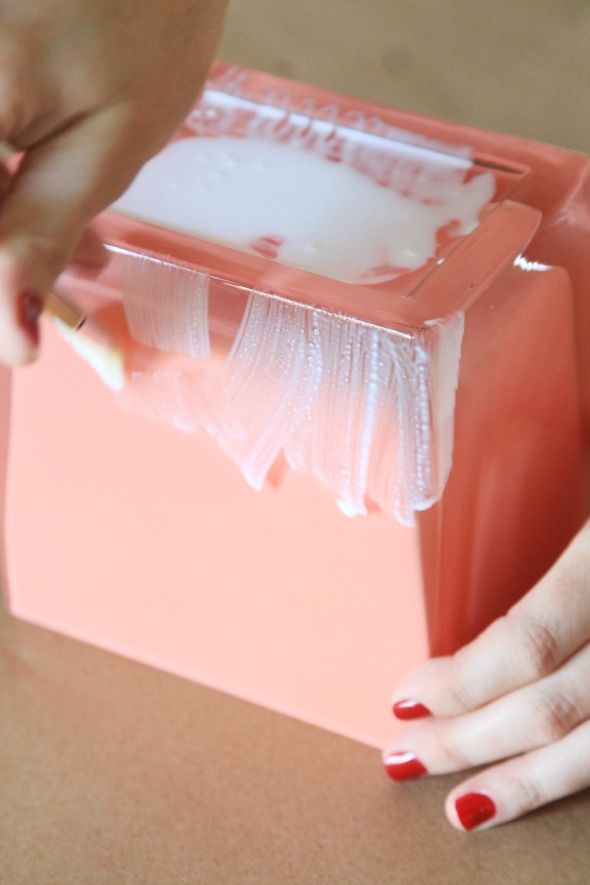
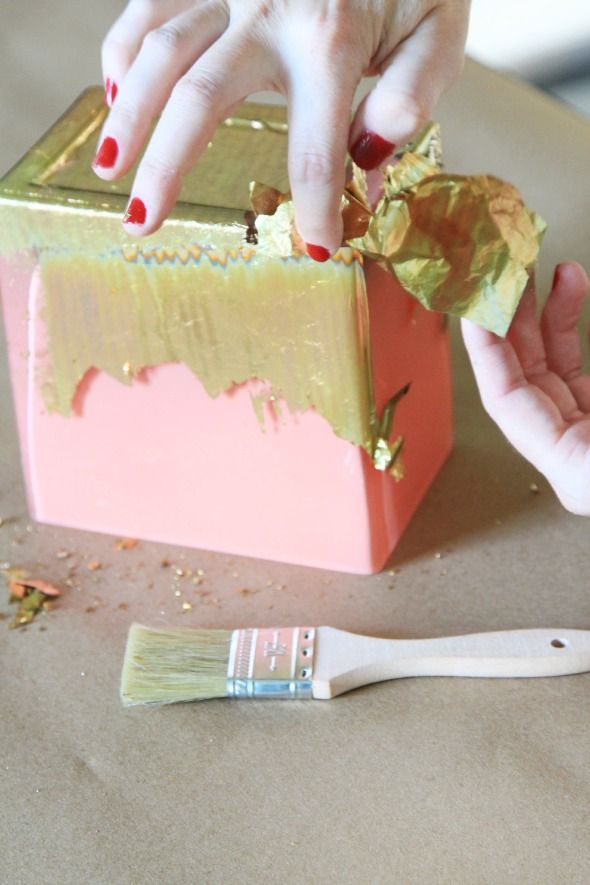
The size will be completely clear and tacky to the touch when it is ready for the leaf. I applied the sheets with a soft bristled brush, but it's fine to just use your (clean) hands too! You want to really flatten the leaf sheets against the vase, making sure there are no air bubbles or wrinkles.

The leaf will magically stick to where ever the size was painted on, but will brush right off the rest of the vase.
If there are any cracks or gaps, I just use some of the extra leaf bits on the table and rub them onto the size with my fingers. It's really so easy to get a smooth finish!
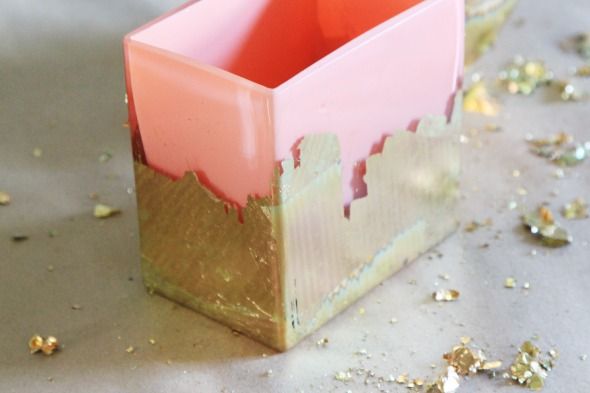
I think the dimension of the finished vase is so pretty with the bright color inside the glass and the rose gold on the outside!
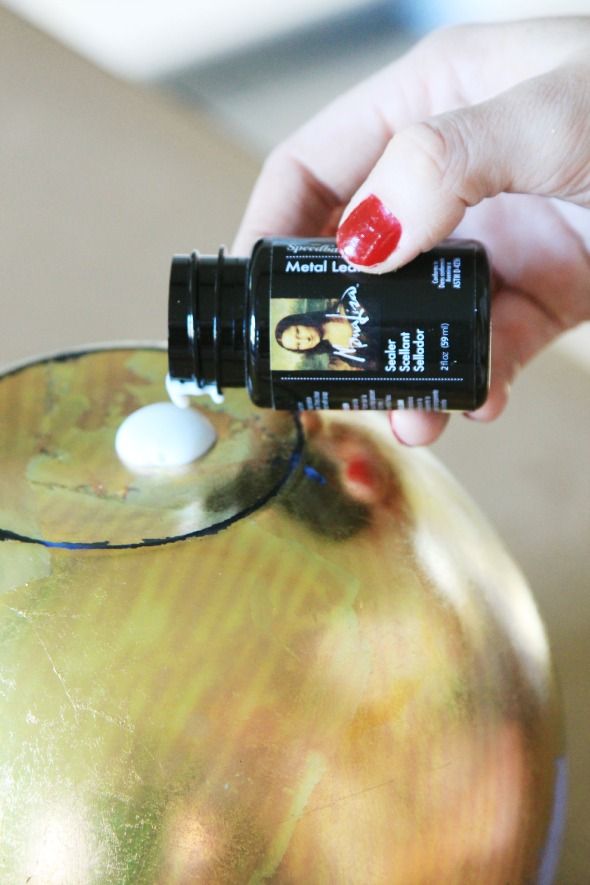
After the leafing is done, you'll want to paint on a layer of sealer to help protect the gold leaf.
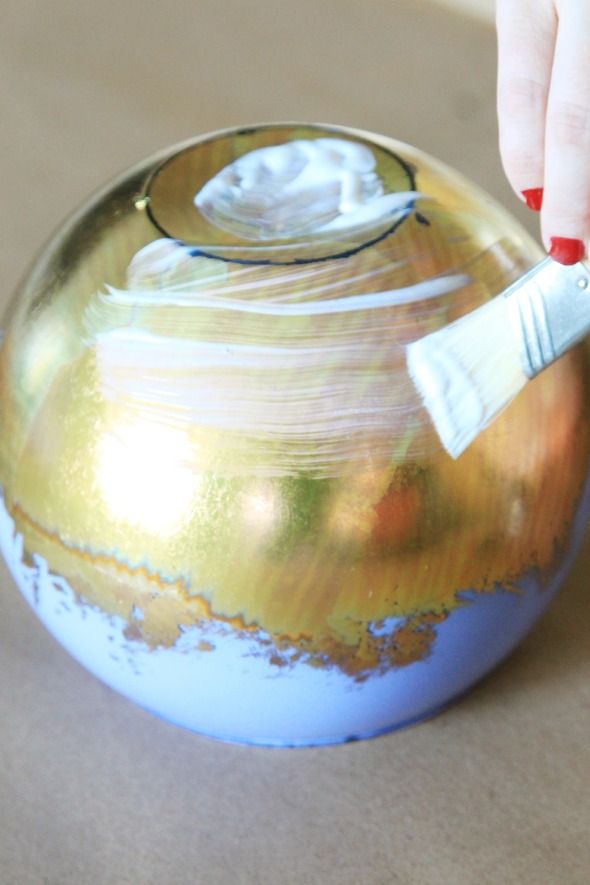
When the sealer is all dry, you're ready to start arranging your bouquet! I know it's tempting to do a blunt cut at the bottom of your flower bunch and just toss them in a vase, but I'm learning it makes for such a more beautiful bouquet if you cut and arrange the flowers one by one. The Bouqs is also a great place to get tips on floral arrangement and care (here's the page on ranunculus).

I tried to keep the arrangement organic and swoopy (the tall larkspur stems helped there!).
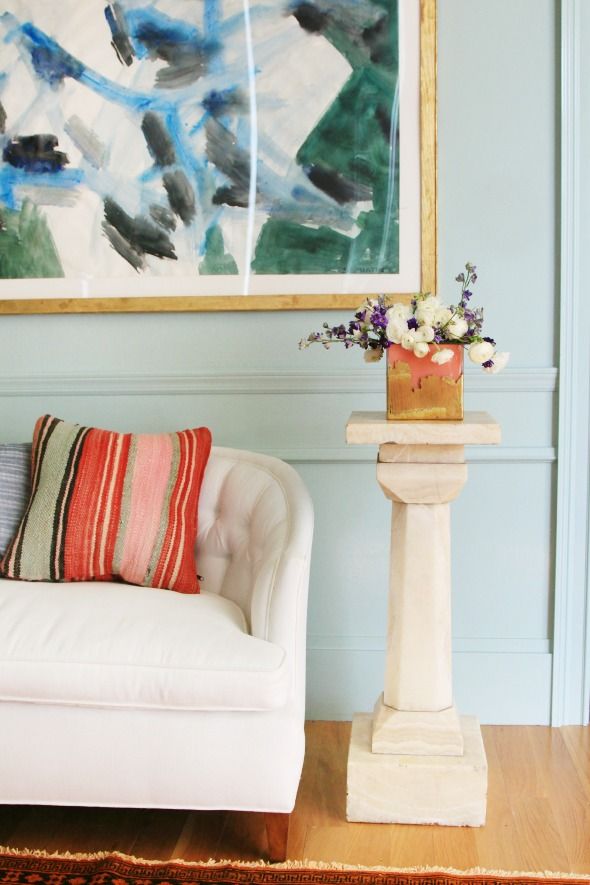
This arrangement was a gift for my friend, who needed a little extra love this week, and I love how it turned out. The Bouqs suggests that if the water is changed every few days, the flowers will last an additional 1-3 weeks. They suggest adding a little sugar or Sprite to the fresh water once you've run out of the flower food that comes in the packets.
No comments:
Post a Comment