Wednesday, April 30, 2014

Bento Box Lunches and a NatureBox Give Away

I've been trying hard this year to refocus our family on health and wellness. One thing we recently did that I'm so excited about is jumping on the bento box bandwagon. My kids have never been happier about making and eating their lunches!

 photo NatureBox9.jpg

We bought these laptop lunchbox cases on Amazon, along with a few other little things to help make the lunches more fun and easier to pack, like this set of reusable cupcake liners and these adorable mini-forks (Evie's obsessed with the panda one). I also have these tiny shape cutters that are fun for special days or when the girls want to spend extra time making their lunch.

 photo NatureBox8.jpg

I love how easy it is to add variety to a lunch with these little boxes. The girls love to add a small handful of this and that, and I love that they're now getting a better mix of fruits, veggies, grains and proteins. And they usually eat all of the small portions, which is more than I can say for our old lunch-packing methods!

 photo NatureBox7.jpg

We've had our NatureBox subscription for a few months now and I love using these delicious snacks in our bento box lunches.

 photo NatureBox1.jpg

It's like Christmas when the NatureBox package comes each month. There's not been one snack yet that my kids won't devour! The carrot strawberry chews, the fancy dried figs and the PB&J granola go FAST at our house!

 photo NatureBox3.jpg

I am trying to eat less gluten, so I love that you can select snack choices based on dietary needs on the NatureBox site. They have a really great selection of healthy (and seriously delicious) choices. No artificial colors, flavors or sweeteners ever with these snacks. Evie loves the figs and the blueberry almonds in her lunch as much as I do. (PS how adorable is the little sauce tub? We usually end up using it for hummus or a nut butter).

 photo NatureBox6.jpg

 photo NatureBox10.jpg

My Claire is ALL about the dried pineapple and apples and loves all the sunflower seed and roasted chickpea options.

 photo NatureBox5.jpg

NatureBox is a beloved sponsor and wants to share the love with you LGN readers. They are offering two six-month long subscriptions today! To enter, please browse the snack options page HERE and leave a comment on this post with the snacks that sound the very best to you! US readers only this time. Contest ends May 7 at midnight. Good luck!

Psst... Get 50% off your first month of NatureBox with the code LGN50 (so, only $9.95)! There are a couple of subscription sizes to choose from, and shipping is always free!

 photo NatureBox2.jpg

Monday, April 28, 2014

Black Clawfoot tub

(Sorry for the radio silence here - we've been having some technical difficulties! Thanks for your patience! xo)

I've always loved big clawfoot soaker tubs. I've been keeping an eye out for a good deal on Craigslist and I found this big, pretty one for only $200! I had to drive up to Prescott to get it (about two hours), but the drive is gorgeous and it was nice to have an excuse for a little road trip.

 photo 01111_jF0dl6FUYoY_600x450.jpg

The inside enamel is practically perfect, but the outside of the tub could use some work (really, just a good clean up and some paint). I mostly need to figure out the hardware and what I'm going to do for the tub's plumbing. I'm obsessed with Jenna Lyon's tub and hardware. 

 photo ScreenShot2014-04-24at83117PM.png

 photo livingetcjennalyons5.jpg

The new tub is going in the bathroom under the stairs, next to the playroom. It's where we bathe the girls and it's the bathroom that guests will likely use, since it's closest to the living room and kitchen. You can also sort of see right in to the room from the entry if the bathroom door's open. I'd love for it to be a pretty room, but there's a ton to do!

 photo xDSC_0498.jpg

We're going to just list the double vanity on Craigslist and get it out of there. I've got some fun ideas for a single sink and new tile for the floors and walls.

 photo DSC_0501.jpg

The HUGE tub is going to be a nightmare to remove and haul away. The nice guy who helped remove our well is coming back out to help with this one!

 photo cDSC_0505.jpg

If we can salvage it, I'll happily donate it, but I'm not sure even ReStore would want the tub. It's so huge.

 photo cDSC_0502.jpg

The new tub is 60" long, which is just about perfect for the space. I can't wait to get it in there! I've been dreaming of black for the outside of the tub, but I'm thinking a super, super dark green or blue would be pretty too.

 photo black-claw-foot-tub.png 

 photo ScreenShot2014-04-27at102355PM.png 
FJ Interior Design

 photo 6a00d8341c72af53ef011571506c89970b-pi.jpeg 
source

 photo tub-680x1024.jpg 
Creative Homebody

 photo fb0c7bb0b62ef4f10c9e253ef505d496.jpg 

 photo 65be39b576f776416d81820e704cccb8.jpg
House and Home

Do any of you have experience with fixing up an old clawfoot tub? Any tips would be very appreciated!!

Tuesday, April 22, 2014

Adding Paneling to Hollow-Core Doors

I've been pretty obsessed with raised paneling lately and when it was time to figure out something to do with the closet doors in the studio, I knew I wanted to experiment a little with moulding and see if I could make the cheap hollow-core door look more interesting for not a lot of money.

 photo IMG_3260.jpg

Here's a sort-of during shot of the studio, after we had painted the walls and done the floors and other trimwork, but before I did any decorating.

 photo IMG_1048.jpg

I remembered these wooden rounds from Home Depot and found some trim (it's called brick moulding) that was the same thickness as the rounds.


 photo IMG_3583.jpg

When I got home I experimented with tape patterns to try and figure out something that would work with the door proportions. It can be a little tricky to get it right with the door hardware and while leaving a sort of toe kick/kick plate area at the bottom. These doors are short too, so it felt extra difficult. At first I tried to make three circles work and they didn't really fit, but mostly it just looked like a giant stop light. Not cute.

 photo IMG_3398.jpg

I knew what my circle + square dimensions had to be, so I cut out four of the squares first for the two doors. Then I played around with the scrap moulding to figure out a rectangle for center area. I tried a few different sizes and even tried a rectangular panel to match the layering of the circle + square, but in the end I decided to keep it simple and small with just the brick moulding.

 photo IMG_3635.jpg

So the real trick with adding moulding to any door is to spend your time on the top shape and get that one perfectly perfect and squared with the edges of the door. And then the other shapes can just be placed using the lines of the first shape. Hopefully your first square is not at all crooked, but if it is, it's better for the other shapes on the door to be equally slightly crooked. That sounds weird, but your eye won't really notice if the whole thing is just a little tiny bit off, but if the individual shapes have been corrected and are off in relation to each other, that's when thinks start looking wonky and bad-DIY.

 photo IMG_2768.jpg

So, after I measure out and spend a lot of time getting that top square right, I just used a piece of scrap wood to line up the trim for the next square. The line will be perfectly even and straight this way.

 photo IMG_2761.jpg

I nailed on the paneling with my angled nailer with 1 1/4" brads, since the wooden round and brick moulding were so thick. And then everything got caulked and a light sanding.

 photo IMG_2747-1.jpg

I guess I didn't take a photo of this step, but before I painted the doors and paneling, I sprayed the door handles gold outside (without removing them first! Rebel!). I also replaced the old door hinges with new solid brass ones.

 photo cIMG_3690.jpg

I regret not taking the time and effort to spray the doors with my Critter spray gun, but I was up against a time crunch, so I just brushed them with oil-based paint tinted to Benjamin Moore's Gentleman's Gray, which is actually a really beautiful, deep navy. 

 photo cIMG_3708.jpg

The finish is not bad since I laid the doors down to paint them and oil-based paint spreads really beautifully. But it's not exactly perfect like it could have been if I had sprayed them. :(

 photo IMG_3716.jpg

I'm still happy with the doors though! They make the weird closets that flank my desk sort of a fun part of the room now. Eye-sore-turned-room-feature is my favorite kind of DIY.

 photo IMG_3272.jpg

I especially like how the light catches the dimension of the paneling in such a pretty way. I love all the shadows.

 photo cIMG_2931.jpg

Monday, April 21, 2014

Natural Cleaning Products That Actually Work (and Don't Stink!)

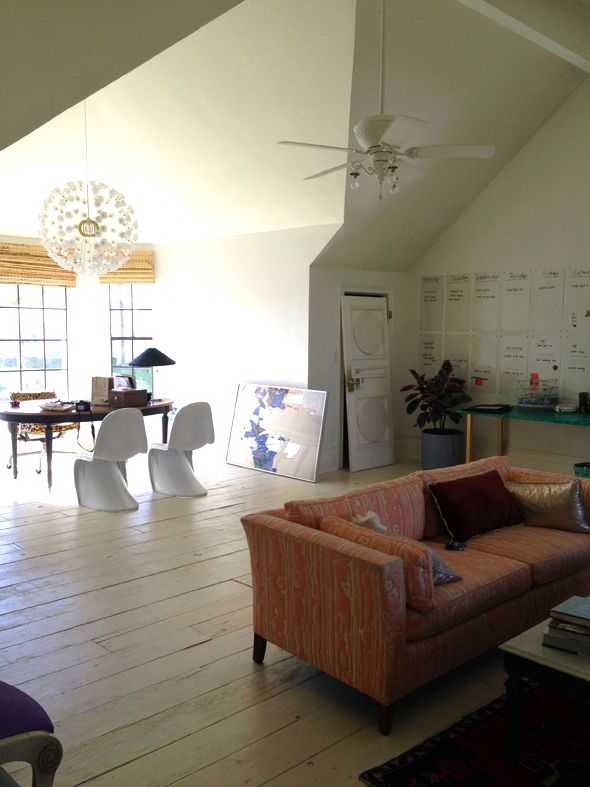
Happy Earth Day tomorrow! I'm packing my bags for a quick New York trip this week. On Thursday I'll be hosting a fundraiser event that I'm really excited about. I have partnered up with the eco and budget-friendly appliance company, Amana, this year to share home ideas and tips that are also green and not expensive. Amana works a lot with a great organization called Trees for the Future. I hope you can join us for the fundraiser if you're in the NYC area. You can learn more about the organization and can RSVP for the event by visiting trees.org/nyc. If you use the discount code AmanaFan, you'll get $25 off. :) 

Several months ago my wonderful friend Mara held a really cool natural beauty night, where we learned all about the best natural, non-toxic products to use on our skin and hair. It was totally eye-opening for me. Since then I've been putting in an effort to use less toxic cleaners in our house too.


For a while, it felt like every recipe for a homemade cleaner was pretty much just white vinegar, which... gag. Not my favorite smell for a bathroom. So I've been testing the waters of homemade natural cleaning products and I've found a few that 1) work really well, 2) don't require crazy amounts of time or weird ingredients, and 3) don't stink like vinegar.


 photo IMG_3489.jpg

 photo IMG_2495.jpg

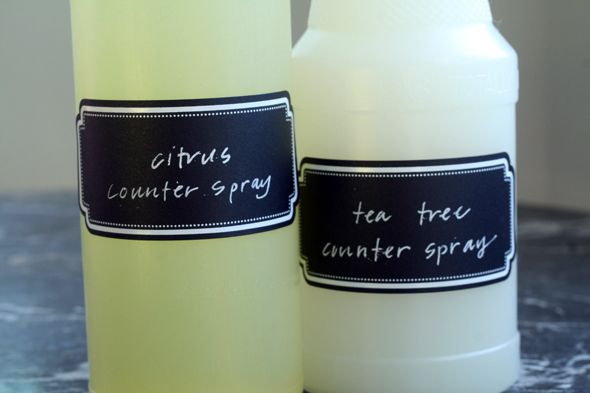
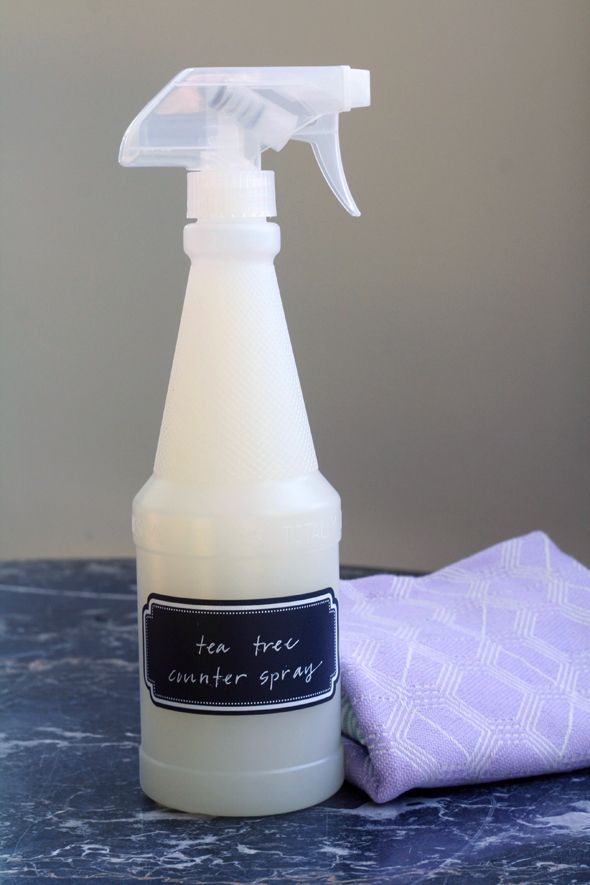
First up is the most simple. I love the clean scent of tea tree (I don't ever like cleaners to smell too floral or sweet). I bought a starter set of essential oils on Amazon for about $20 and I've been happy with the quality. The set comes with eucalyptus, lavender, orange, lemon, tea tree and peppermint essential oils. Not a bad deal!


 photo IMG_3410.jpg


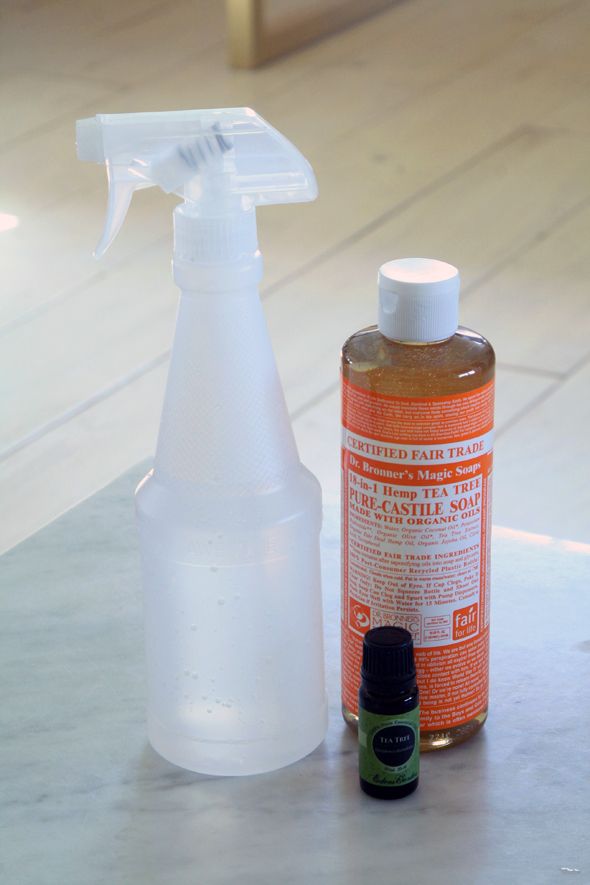
To mix the cleaner spray, reuse an old spray bottle (what I did) or pick up a new one at the dollar store and add one cup of water to every two tablespoons of Castile soap (I used the Tea Tree scent again). You can buy Castile soaps at Whole Foods and Sprouts and even at CVS and Walgreens sometimes. The Lavender scent is perfect for washing bedding! Some of my friends use Castile soap as shampoo and body wash - it's very gentle, but also cleans fantastically.

Then you add a few drops of the tea tree oil to the spray bottle and shake it up well. You'll have an amazing cleaner on your hands that works as well as the other store-bought stuff but has none of the scary ingredients or horrible vinegar smell.

 photo IMG_3477.jpg

This next one might feel a little more intense, but it's actually really easy and kind of fun to make. I heard about the idea here first and it's a great one. A single batch will last forever too, so your efforts go far.

 photo IMG_3357.jpg

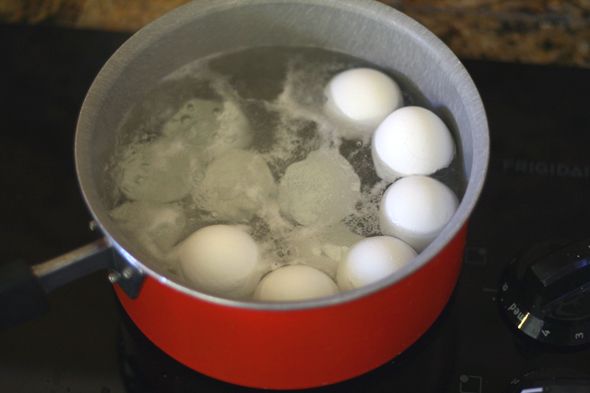
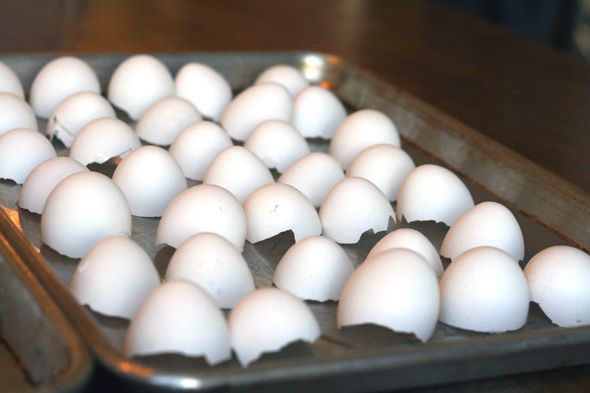
To make your own scrub that will clean all your sinks and tubs like they've never been cleaned before, just start setting aside your eggshells. I put them in a gallon size ziploc, tucked away. Over the course of a couple weeks I'll have three or four dozen eggshells to rinse out, boil for about 10 minutes, and then spread out on cookie sheets. A day or two later, the shells will be completely dried out and very brittle.

 photo IMG_2559.jpg

 photo IMG_2586.jpg

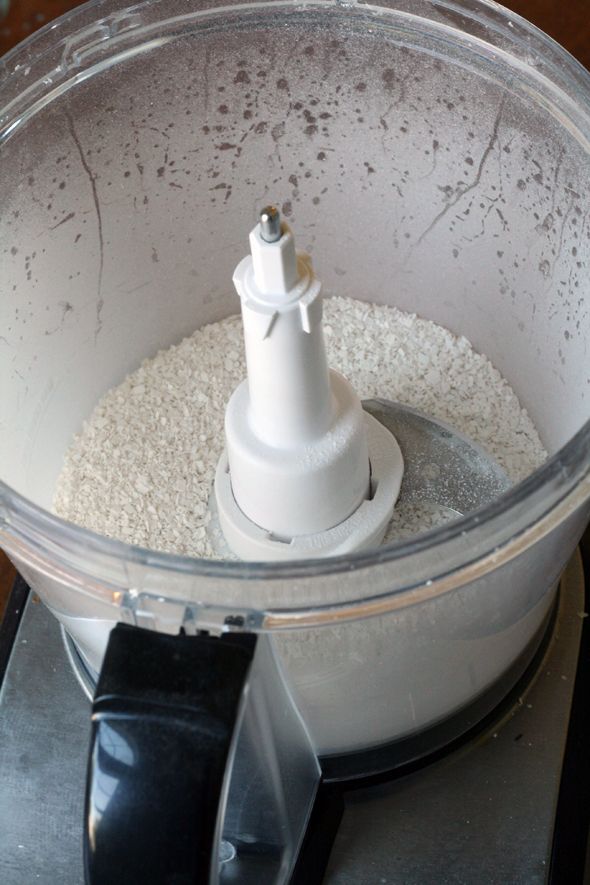
The shells will break down very easily in a food processor (I've heard a coffee grinder works very well). They're so brittle at this point, there's no way any damage would be done to your machine.

 photo IMG_3295.jpg

 photo IMG_3298.jpg

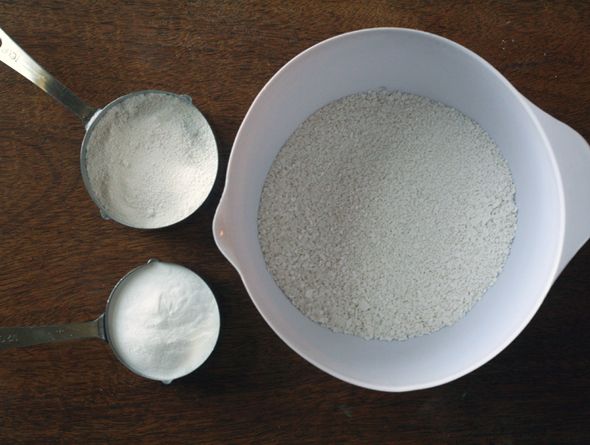
The only "weird" ingredient you'll have to go out of your way to pick up is calcium powder, but it's easy to find at health food stores or online. It's cheap too, just a couple dollars.

 photo IMG_3366.jpg

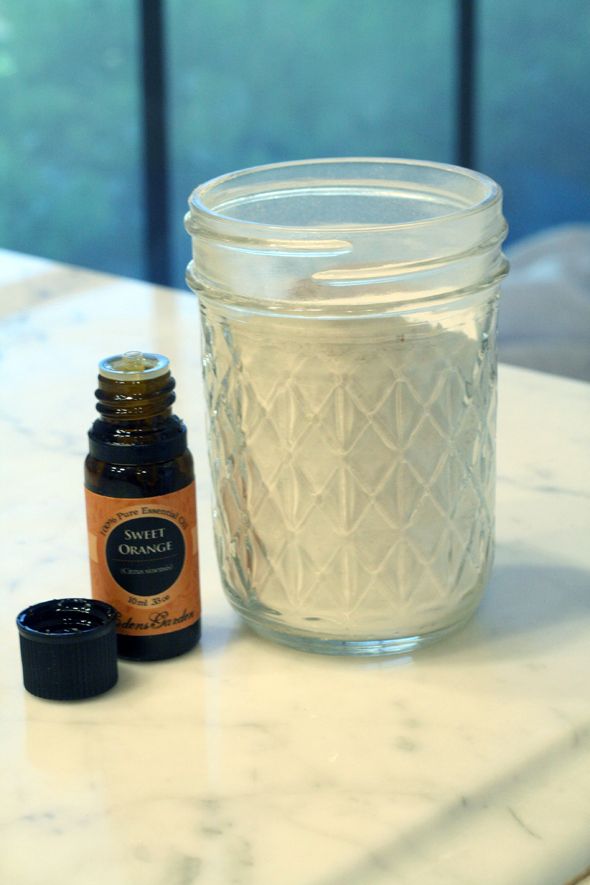
In a bowl, combine 1/2 cup of baking soda, 3/4 cup of calcium powder and about 20 drops of essential oils. I did half a batch of lemon and half of orange.

 photo IMG_3304.jpg

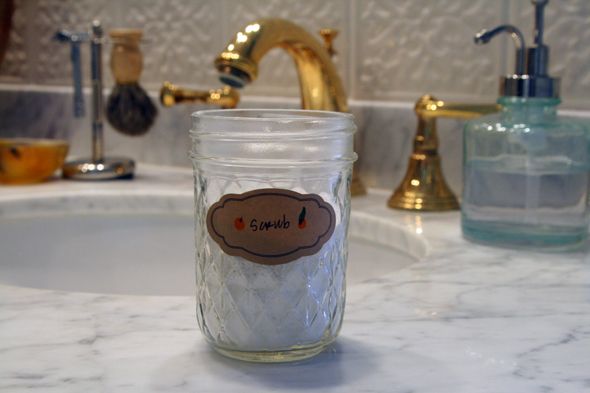
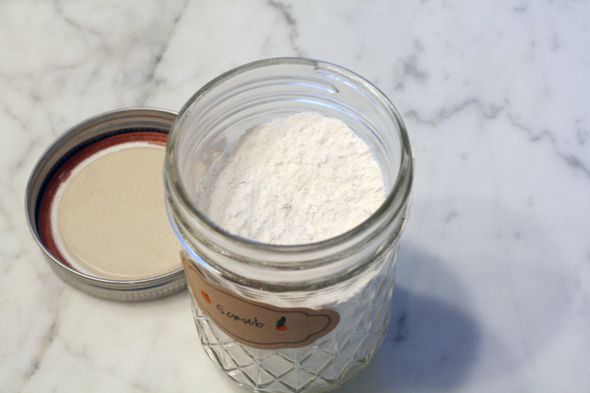
This makes enough scrub to fill two pint-size mason jars, which should last you at least a couple months. I saw online that people were reusing parmesan cheese or economy sized spice jars that have that sprinkle spout top, but the mason jars work great too.

 photo cIMG_3327.jpg

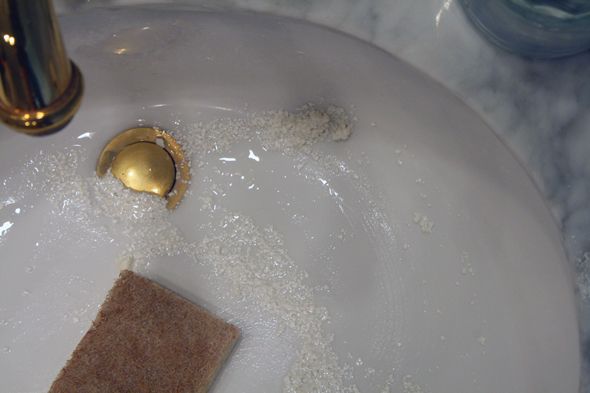
The powder fizzes when it touches water and it really brightens up that porcelain! And the eggshells really scrub well, but it doesn't feel like you're scratching your tub up or anything.

 photo IMG_3352.jpg

I use it on my bathtubs and showers, our sinks and even our toilets get a good scrub down once a month (I turn off the water valve at the base of the toilet first, flush the toilet so it's dry and that makes it easy to really clean things well).

 photo IMG_3342.jpg

I think next time I might try one of the peppermint oils to mix things up a little.

 photo IMG_3330.jpg

My third tip is so, so simple, it's kind of a 'duh' thing, but I feel like not a lot of people do it. We all spend a ton of money on expensive candles and sprays to make our homes smell nice, but homemade potpourri is SO cheap and the scent lingers way longer!

 photo IMG_3368.jpg

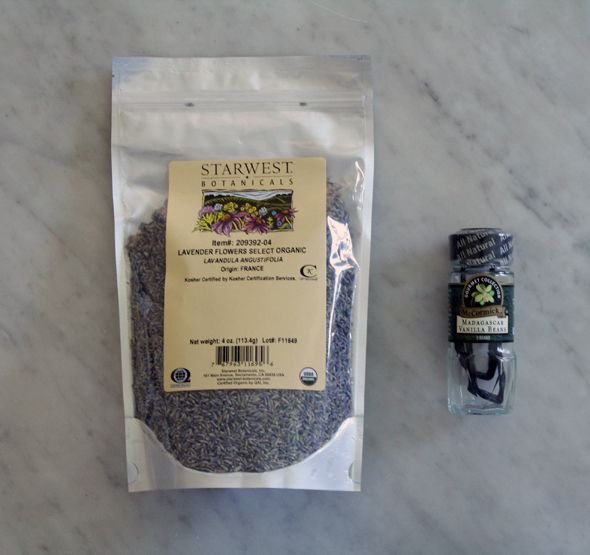
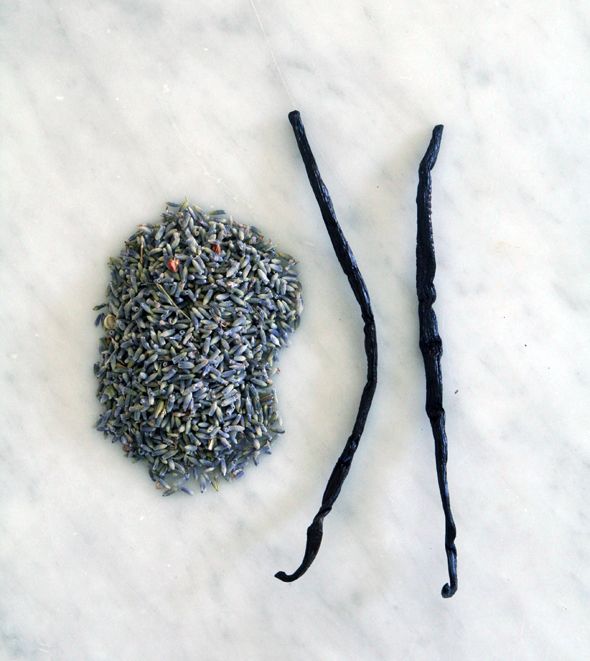
I love the clean scent combination of lavender and vanilla. You can buy a bag of lavender flowers at a health food store and vanilla beans can be found in the spice aisle at most grocery stores.

 photo cIMG_3372.jpg

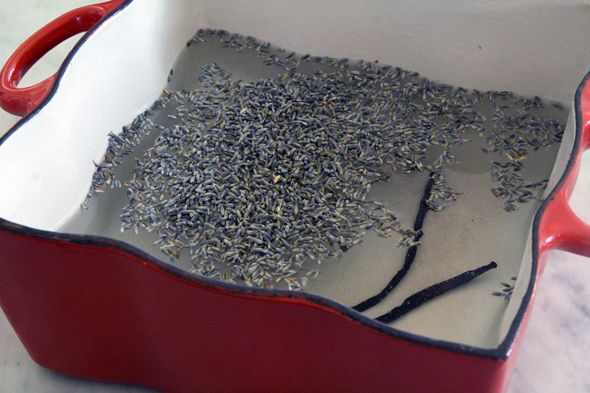
To make the potpourri, bring a big pot of water to a gentle simmer and then add a 1/2 cup or so of lavender flowers, two vanilla beans and several drops of lavender oil (and maybe a drop of vanilla extract if you want it to be extra vanilla-y, or in lieu of the beans if you don't have any). After about 30 minutes, your whole house will smell amazing. I let the potpourri simmer for at least a couple hours on low heat and the scent will last for two or three days. I wish I could say my $30 candle's scent lingered that long!

 photo IMG_3392.jpg

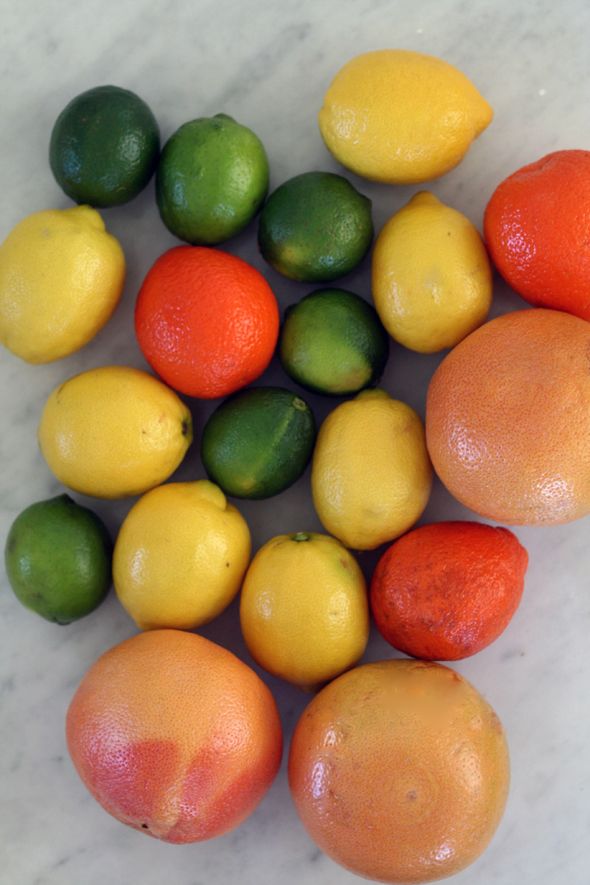
The last tried-and-true natural cleaning recipe actually uses vinegar! There is a way to harness the wonderful cleaning power of vinegar while masking most of the intense scent. (I almost wrote pungent there, but eww, no. Not an okay word to use.)

 photo IMG_2495.jpg

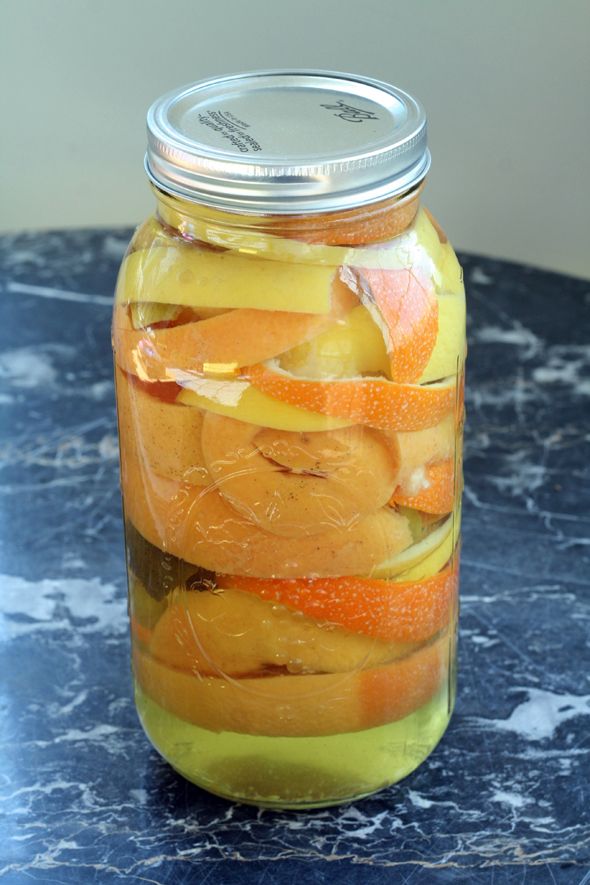
We're lucky to have an over-abundance of citrus here in sunny Arizona, and lots of friends and neighbors with wonderful trees and more than enough fruit to eat/use for making counter spray. But next time you have a craving for fresh-squeezed orange juice or lemonade, save all the peels in a big mason jar that's filled to the very tip-top with white distilled vinegar. You can add more peels over time, but it's important that all the peels be submersed in vinegar, or you might get mold.

 photo IMG_2545copy.jpg


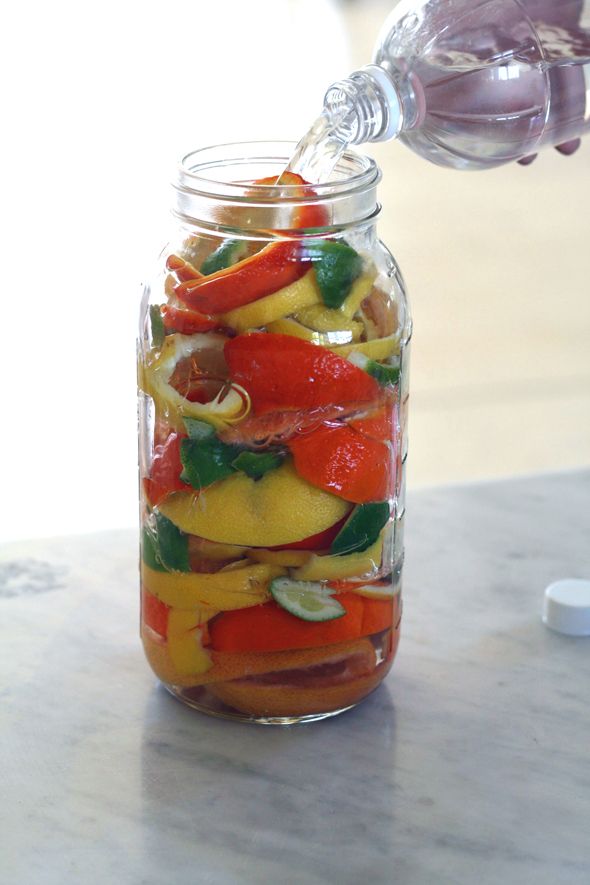
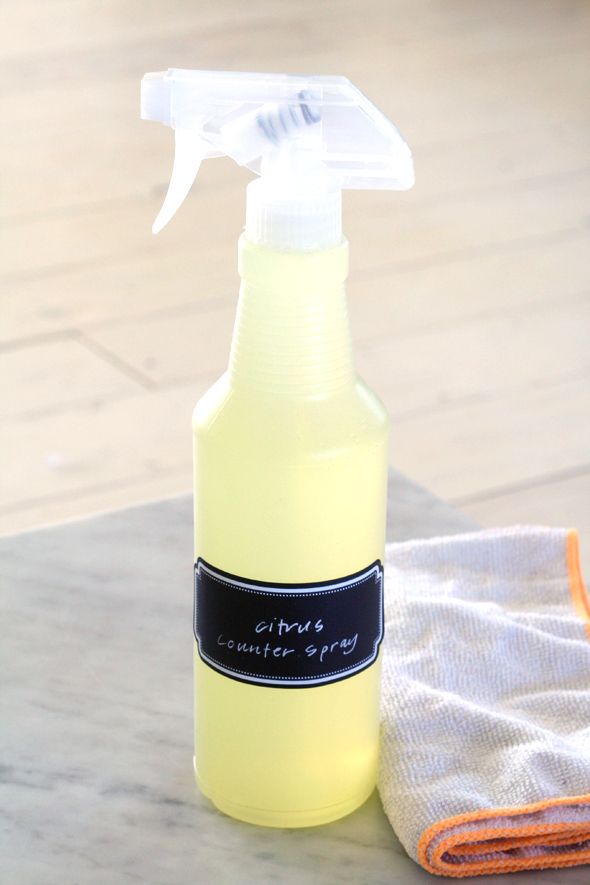
I like to add some essential oils too, for good measure. After at least two full weeks, the vinegar scent will start to go away, but the cleaning power will remain! Your counter tops will smell citrusy and look brand new! I use a gravy sieve to strain out the cleaner into a spray bottle. 

 photo IMG_3466.jpg


Aren't those chalkboard labels cute? I picked them up at Staples I think and I love that I can use my Chalkboard pen on them (which only wipes off with a wet rag), so I don't have to replace the label each time I make a new batch of cleaners.

 photo IMG_3434.jpg

So those are my best recipes for natural cleaning products! Not too crazy, but guilt-free, effective and nice-smelling. I also added some other tricks here in this chart below. I was surprised at how well the lemon-juice-instead-of-bleach tip works! I feel like between switching to a front-loading washing machine (Amana really has a great/affordable/eco-friendly one, btw) and taking bleach out of my cleaning routine, I'm really cleaning up my laundry room act! 

Also, if my iron on a damp cloth trick doesn't work for you when trying to remove heat marks on furniture, try the mayonnaise idea here below. I must have a sensitive nose or something because this is another one I don't love the smell of, but it doesn't really linger. And it really does get those heat marks out!


So what works for you? I'd love to hear what your favorite eco-friendly tips are!


This post was brought to you in collaboration with Amana Appliances, an earth-friendly and environmentally conscious company. Learn more here.