Thursday, February 28, 2013

My Kitchen Pendants and a Circa Goodman Substitute

Along with what seems like every other decorator on the planet, I love Circa Lighting's Goodman cone pendants. The prices rance from about $400 to $900 each depending on the finish. They are so gorgeous:


(all images via Circa's Blog)


When I was deciding on pendants for our little kitchen remodel (both in size and in budget), I really wanted something like those from Circa. If only these paper shade cone pendants from Shades of Light existed at the time! Maybe for our next house :)


For our kitchen though we ended up with these black/oil-rubbed bronze pendants from Home Depot (of all places!). I wasn't even looking for pendants that trip to the HD, but they sang out to me from across the light bulb aisle.


I bought three on the spot for about $75 each, which is a pretty great deal, I think.


We love how they look with the newly painted cabinets and they work great - so no regrets here for going the inexpensive route this time.


Where did you buy your kitchen sconces?

Wednesday, February 27, 2013

Inlay Boxes at Homegoods

Did you see that Homegoods has a bunch of inlay pieces (trays, jewelry boxes, mirrors, picture frames and even furniture) in gray, black and red backgrounds? I picked up a few pieces last week to add to my hostess gift stash, including two of these jewelry boxes (one in gray and one in red), and I can't decide which one I'm going to keep for myself. :)


They had quite a few chairs that looked a lot like these. They weren't crazy cheap (I think about $200 each), but they were definitely discounted from what similar chairs usually go for. And talk about a look! I love how these chairs pair up so well with more modern furniture.


Did you score any of these Homegoods inlay pieces? Let's see!

PS In case you missed it last spring, here's my DIY version of an inlay-style dresser.

Tuesday, February 26, 2013

Reader DIY: Making an Upholstered Daybed

I loved this bed project when Whitney of The Avarice blog submitted it, but it seemed like an extra great time to post about her idea since we were just talking about daybeds. This is such a easy and affordable way to get a large daybed for your home. Wouldn't this exact bedframe with a tailored mattress cover look really cool in a large living room across from a broken-in vintage black leather sofa and a pair of linen-upholstered chairs in an edgy shape? AND how great is the same bed in a little girl's room? Such a versatile piece!


Whitney's daughter, Lilly, has a small bedroom and the pair of vintage twin beds that Whitney bought at auction for $70 would not fit side by side in the space, so she decided to make just one bed using the two headboards and two of the four rails.


Whitney said she's usually up for a light upholstery project, but this one was a little larger than she was willing to undertake. So she had the beds sprayed white and sent off to her upholsterers with four yards of yellow cotton velvet. Whitney also sent in this chair that she found for $10 at the thrift store. She went with a polkadot Sunbrella fabric with a contrasting welt on the chair. Outdoor fabric is always a good idea in kid's rooms.


Both pieces turned out so well! I love the yellow velvet, and what a smart idea to put the two headboards together! I have a pair of tufted twin-size headboards that could work perfectly for this project and now my wheels are turning! (You can also check that post for tips on DIY upholstery for framed headboards, in case you're hoping to tackle a similar daybed project on your own). I'd have to figure out a work-around for my lack of matching rails, but that could be as easy as a little  moulding and paint on a standard metal frame (or something simple like this wooden frame).


Here's another shot from Lilly's cute room. You can check out Whitney's blog for more adorable images of this room and other design projects she's worked on.


If you'd like to share one of your design projects on LGN, submissions can be emailed here. Thank you!

Monday, February 25, 2013

Swan Prints

Our bedroom is starting to come together. I guess really all I have left is to figure out a headboard (that's why we have an extra row of pillows stacked on our bed - something soft to rest our backs on for the time being!) and maybe a little art project for the long wall to the right here. There's also a chair on the other side of the room that could probably use new upholstery. But for now we're enjoying our recently purchased bedside chests, lamps and rug (on super-sale!). The DIY roman shades are working beautifully (still enamored with the tumbling block tape trim!) and the art has been hung. I'm happy with both the vintage oil painting on the window side of the bed and the swan print on the right side:
   
Remember this post? I ended up buying the swan print thinking it was going to make it up in the gallery wall in our living room, but somehow it fit our bedroom vibe better. It's a little funny how much I love swan photography because I'm actually not the hugest fan of birds in real life (I swear the pigeons can sense my distain and they seek me out). But swans! Aren't they just hauntingly beautiful? And I think they photograph so well, sort of in the same way horses do.

I layered the swan print with a small abstract pastel (that looks so blah here in these photos - promise it's a great little piece in person). I bought it at the flea market a couple years ago and completely forgot about it. When I was looking in the basement for a frame for the swan, it resurfaced, and I think the two pieces were meant to be paired. I like how they work together in the space since I wanted a contained amount of color in here (this green Brunschwig wallpaper and bright blue door are in the hall just outside our room).


Here are a few other swan prints that I'm loving, in case you're in the market yourself:

Patrick Cline used to sell these polaroid prints in an etsy shop, but the shop was taken down recently. (Might be worth reaching out to him to see if he has any of the limited edition prints left?)


If Patrick doesn't, this print is sort of cool, too (and is super affordable).


This $10 print is simple and juvenile in the best way possible.

How was your weekend? It felt a little like spring yesterday here in New York. Everyone was out walking their dogs and playing with their kids, and smiling and brunching and buying flowers. The general enthusiasm on the street was pretty contagious and it made me suddenly remember how much we really do like living here. (side eye over to you, Winter.)

Friday, February 22, 2013

Tips for Decorating a Really Large Living Room

I am starting a project this spring that involves a dauntingly large (mostly long) living room. I've been brainstorming layouts and since I get emailed for advice about decorating really large living rooms all the time, I thought I'd share my single best piece of advice on the subject. It's sort of a "well, duh" concept, but here it is: create multiple seating areas.

Arch Digest, home of Nina Garcia (which I prefer to say with head bobs on the syllables, in a choppy German accent, a la HK. Don't you?)

Here's the truth. If you are sitting more than 12 feet from me, we are going to have a hard time conversing in any meaningful way, so make sure your conversation areas are never more than 12 feet squared, at most. Another truth - three sofas in any space, no matter how big, is one too many sofas. I don't count settees, love seats, daybeds and chaises though. And, in fact, I think a backless, symmetrical daybed/chaise/bench floating between two seating arrangements is just about perfection, so long as it doesn't interrupt the natural flow of traffic in any serious way.

Elle Decor

Houzz


Domino

Lonny (also, well said, Angie!!)  ^^^ 

Elle Decor via


I've been looking around for a great daybed/chaise and I'm hoping to find something really unique for this long and large living room. I'm kind of enamored with this cast iron version from Restoration Hardware. While I really love the idea and the look, I have a feeling the comfort factor of the metal will be lacking in a major way.


Here are some other daybeds that fit the bill of what I'm after. Most of these look a bit more comfortable than the Iron Maiden up top there.


These new pieces can be just as expensive as nice sofas in many cases, so if you're on a budget, try checking out Craigslist and eBay for vintage and antique daybeds that can be given new life with an upholstery job. I poked around on Craigslist and found a bunch of great options for less than $500. This West Elm daybed would look amazing with new upholstery, and the asking price is only $100.


Come to think of it, I just might snag it for my office and recover it in a new color of linen, or maybe something fun like this:

Betsy Burnham via Lonny

Do you have a giant living room? (lucky!) What are your best tips for comfortably and beautifully designing large spaces? Also, I'd love to see photos if any of you have a daybed in your living room. I think it is such a great look.

Happy weekend! xo

Thursday, February 21, 2013

Painting Laminate Bathroom Cabinets

The title of this post really should be "Putting Lipstick on a Pig."

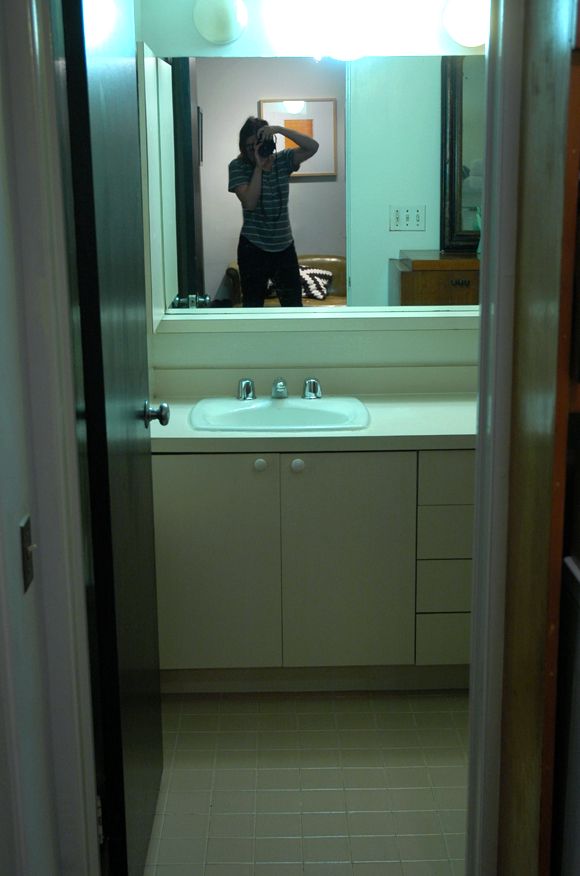
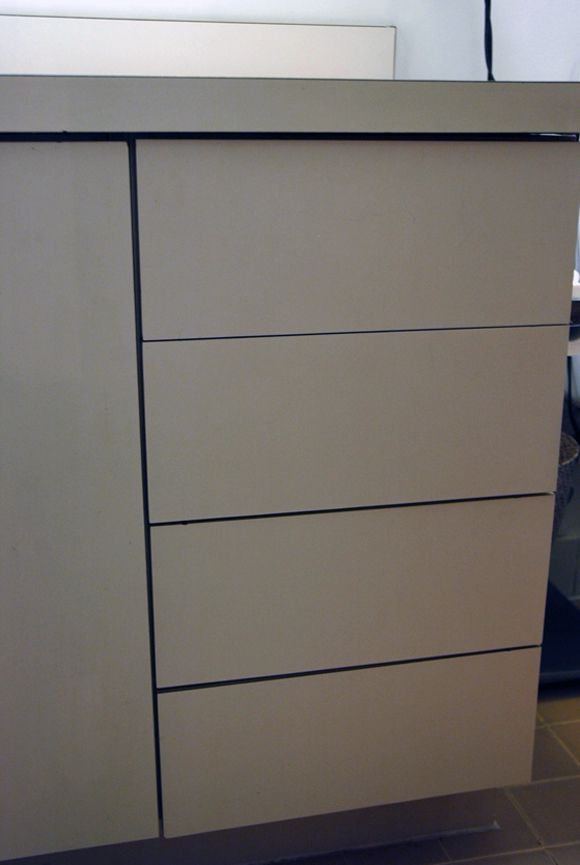
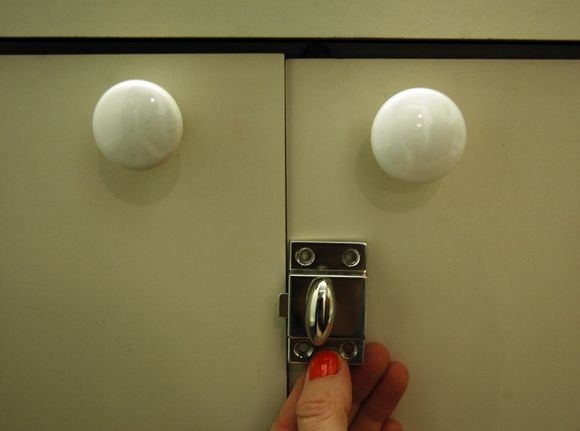
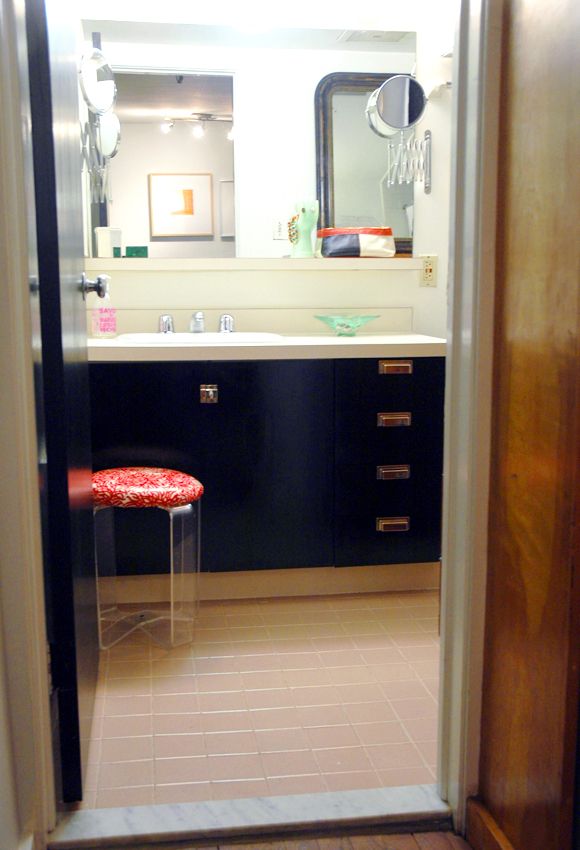
The garden level bathroom is straight from the 70s, complete with lovely beigey-pink floor tile, a non-functioning hot tub style bath (ew) and, my favorite, laminate counters and cabinets. Please do your best to control your jealousy:


It's one of those spaces that you walk in to, trying to brainstorm ways to make it look better, and then you walk out five seconds later saying "Just burn it down."


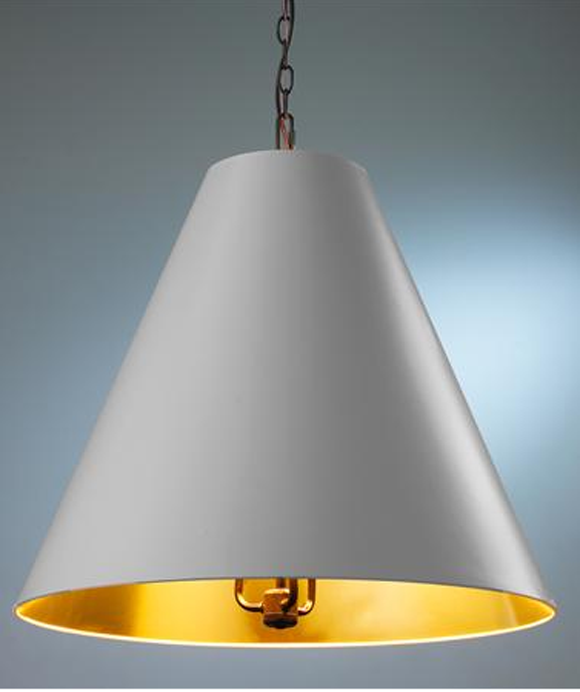
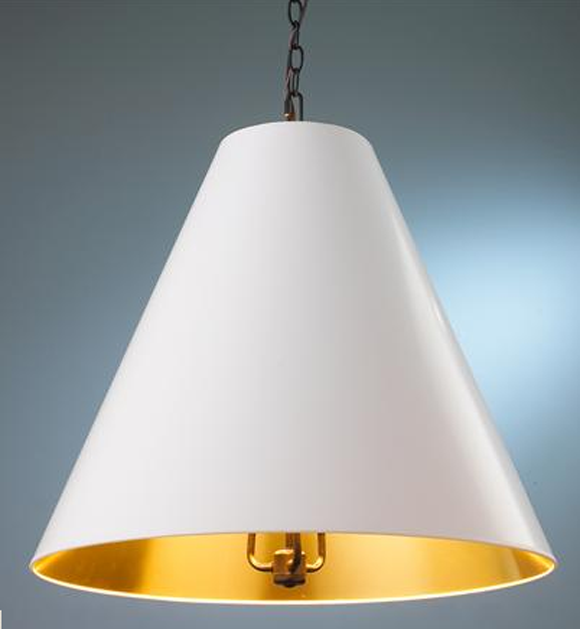
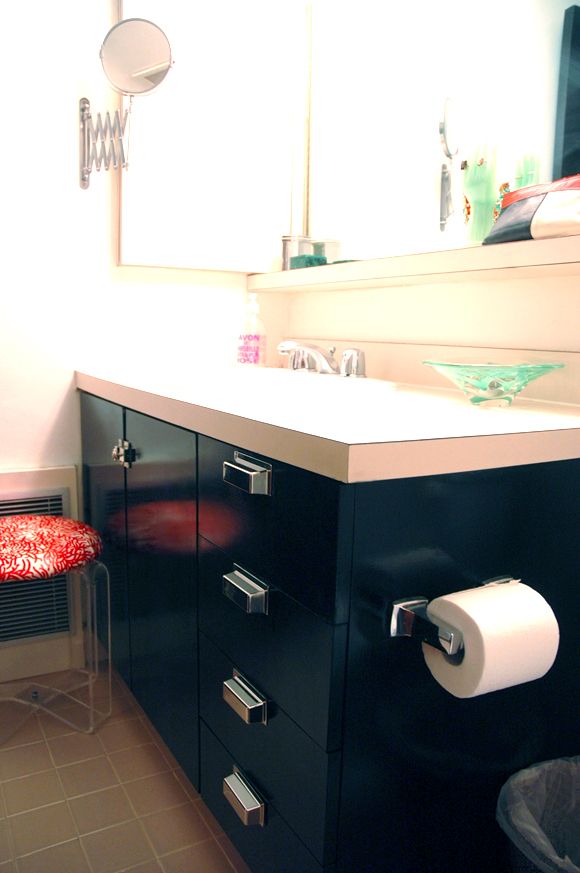
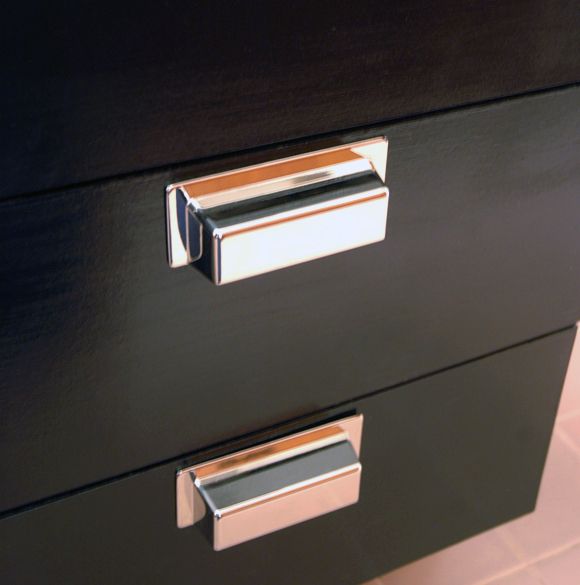
Then last week I was at a Home Depot in Westchester that I hadn't ever been to before and they had a bunch of the Martha Stewart hardware in stock, including these polished nickel babies.


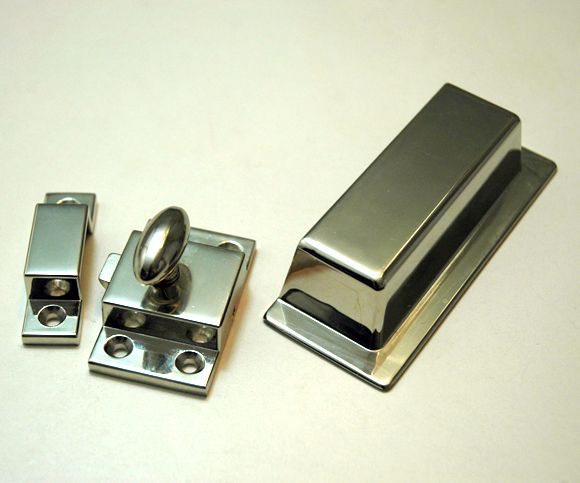
I decided to go for it and came home with $27 worth of hardware and a hope and a prayer for this sad little bathroom of mine.

   
I painted the cabinets with two coats of my trusty Rustoleum enamel in gloss black. If you have similar laminate cabinets that you're dying to ditch, I totally recommend going this route first. Why not? You can prime if you want to, but I didn't worry about it. I just gave the old laminate a good cleaning first. 
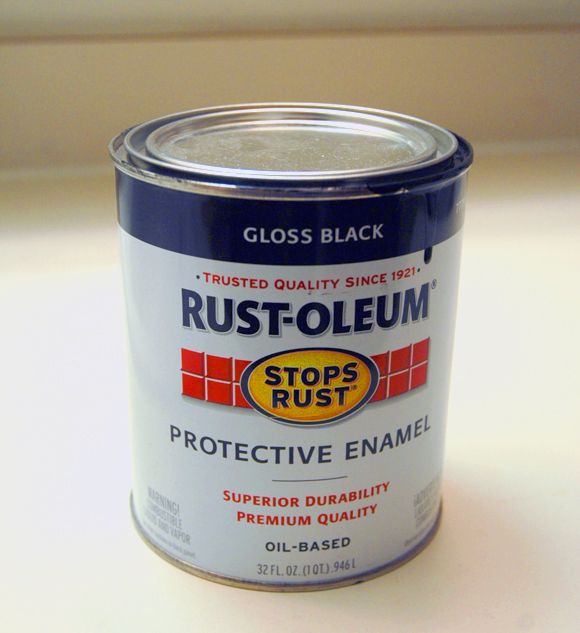
Then I installed the new hardware once the paint was dry to the touch.
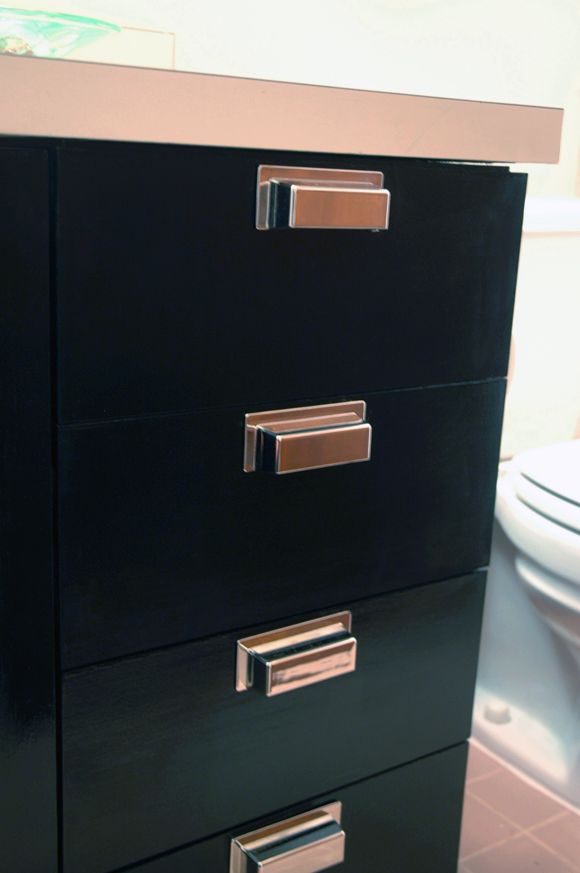
I had to hang the pulls a little higher than I would have normally preferred because of the way the drawer was made (boo). But it's still an improvement in looks and in functionality (I basically needed a screwdriver to pry the drawers open before the pulls were on).


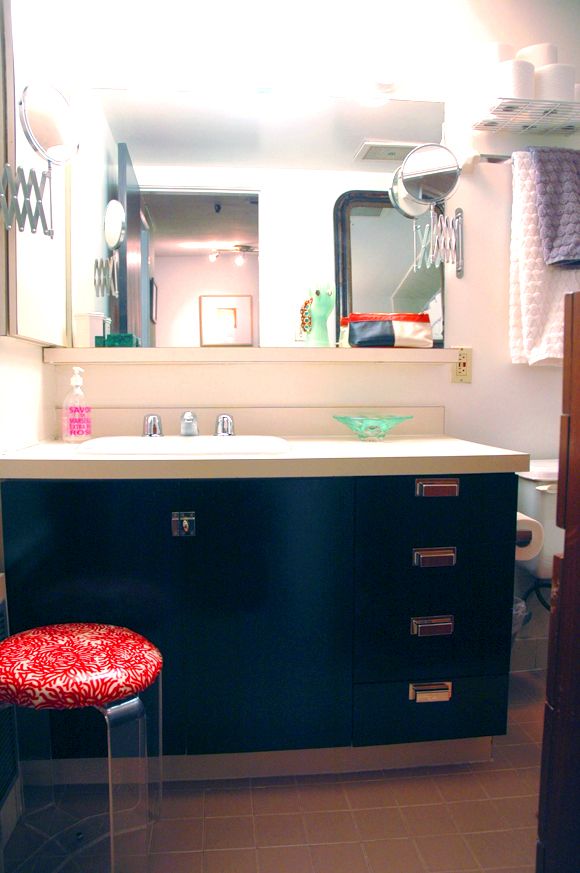
We also brought in the vintage lucite stool I reupholstered here. Evie climbs up and kneels on it when she's washing her little hands.


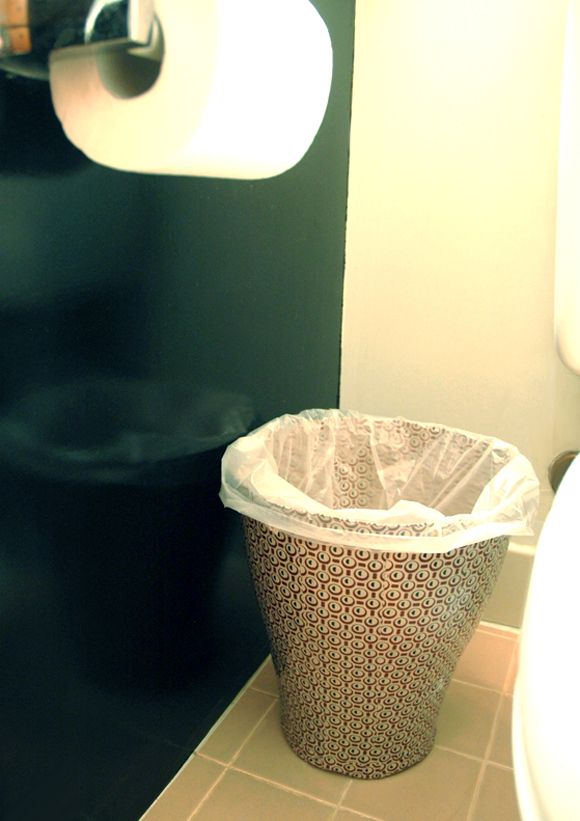
I also added a new wastebasket from West Elm. $5 from the clearance section. Love the pattern here.


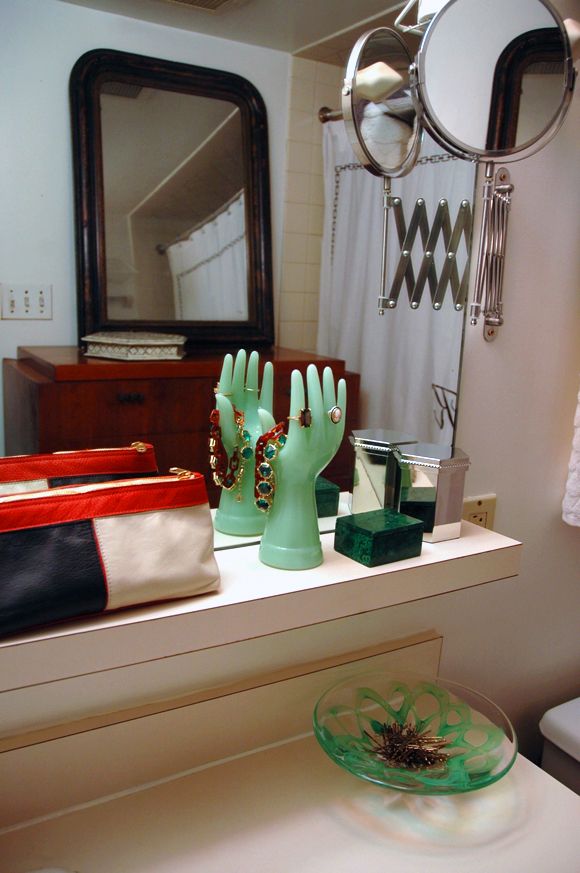
And I hung two of the $5 magnifying mirrors from IKEA. We've had these for a couple of years now and they are A+ in my book. As I side note, I am crazy in love with anything scissor-arm (these brass beauties were my favorite purchase to date).


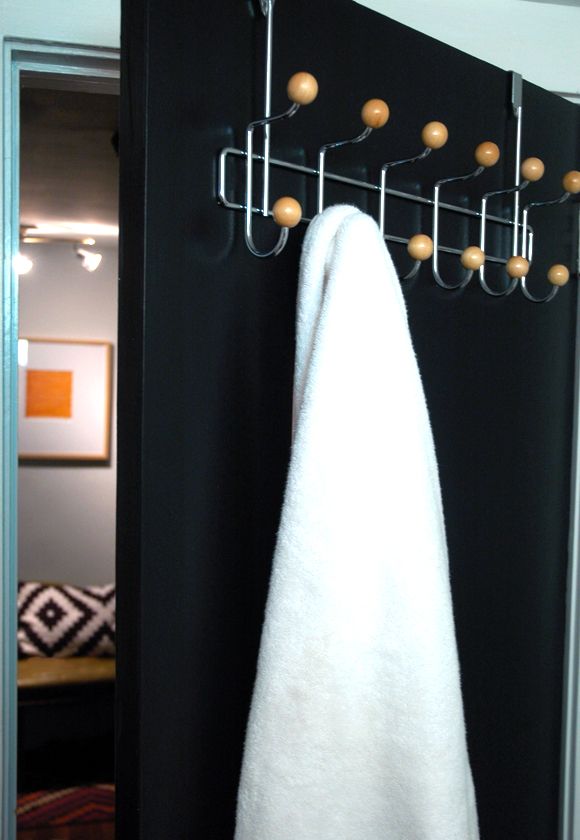
This cute new coat rack from Urban is also a favorite now.


Truthfully, I am crossing my fingers that the landlord is up for a full bathroom reno this summer. (and really, shouldn't he be? maybe I should send him this post as a refresher on how nasty the space is!) But before then, I have big plans for the mirror area and I'm going to paint out the kick panel black and I think I'll add little feet so the vanity looks more like a piece of furniture. I wish I would have just done this while I had all the paint and everything out. In person it's not as obvious that that kick panel needs to be painted out.


All in all, I don't totally, totally hate this space anymore. And burning it down is a distant plan B now. So, that's good! All thanks to these pretty pulls and a little black paint.


What pigs have you been slathering with lipstick lately? I'd love to feel like I'm in good company here. :)