Friday, May 30, 2014

Nordstrom Rack Give Away!!

I don't know about you, but I could use a little retail therapy right about now! :) Stressed to the max over here.

 photo 2.jpg
1  //  2  //  3  //  4

But there's good news for both of us! Nordstrom Rack is now online and if you have a HauteLook account, you are already signed up for Nordstrom Rack. It couldn't be easier to get up to 70% off our favorite brands (with free shipping on orders over $100 - AND they ship to Canada and Australia as well as the US!)

 photo 4.jpg
1  //  2  //  3

 photo 3.jpg
1  //  2  //  3

To enter to win a $100 gift card to Nordstrom Rack, visit here, sign in and take a look around and then leave a comment on this post with a link to your favorite. I'll turn on anon comments for a few days to make it easy to enter. Contest ends next Friday at midnight. Good luck and HAPPY SHOPPING! :)

 photo 6.jpg
1  //  2  //  3

 photo 1.jpg

1  //  2  //  3

This post was brought to you by Nordstrom Rack.

Wednesday, May 28, 2014

Vintage Daybed: FOUND

 photo IMG_4457.jpg

Guess what?! I found a vintage daybed for the library! I stalked Craigslist like crazy and found a listing for this pretty mid-century chaise only an hour or two after it had been posted. I emailed and then realized in the contact info the lister wanted to be texted or called, so I texted. And then that afternoon I started stressing and I called. I seriously felt so nuts, but that was the exact daybed I had been imagining for in front of the bookshelves! And when I finally did get a hold of the seller late that afternoon while I was at the pool with my girls, he said his phone had been ringing off the hook with offers on the daybed and that it was first come, first served. So naturally I threw on a cover up over my swimsuit, a towel on my hair, and raced down there as fast as I could.

 photo IMG_4427.jpg

From the listing, I was thinking there was at least a 50/50 chance I'd be able to keep the existing upholstery. The seller said the "linen upholstery" was in perfect condition over the phone. Turns out it is in approaching good-ish condition, there are a few stains and a tiny hint of a musty smell. And in person the texture of the fabric reads way more "Brady Bunch" than "Belgian linen," which makes total sense, of course.

 photo cIMG_4434.jpg

 photo ccIMG_4437.jpg

So I dug around in my fabric stash to see if I could make good use of some of my hoard. I think it just might be time for Bengal Bazaar to finally make an appearance in my own house. I've been in love with the almost-ikat, sort of Southwest-feeling (so appropriate right?) pattern for years and have been lugging around this remnant with me since we lived in Delaware!

 photo IMG_4480.jpg

It looks good on the day bed, right? (though now I'm seeing that the pattern is upside down in the photo! whoops.) I definitely still love the idea of a floral pattern, but I think this achieves a similar look, but without going full-on girly. A lot of the colors of the fabrics in these two rooms are going to get changed this month and I think the more neutral pattern is a better choice for the space.

 photo IMG_4482.jpg

 photo cIMG_4485.jpg

I'm most happy with how it fits in the room! There's still plenty of floor space for traffic flow once the bookshelves are installed.

 photo IMG_4492.jpg

I love how it is more open to the bookshelves than a sofa would be, but more than one person can comfortably sit there and get back support like with a sofa.

 photo vIMG_4468.jpg

Speaking of which - the CL seller had reworked the back support of the daybed and decided to spray paint it gray, which I think I'll change. The base is in beautiful shape, but the legs need a little bit of scrubbing.

 photo vIMG_4451.jpg

 photo IMG_4446.jpg

The big bookshelf installation was postponed a week, which was a big bummer because this summer is going to be insanely busy. We're hosting a ton of family parties, showers and even a reunion here and I'm anxious to get most of the common areas done or close to it. We also have some really fun photo shoots scheduled that are only furthering the anxiety/pressure! All good things, but I'm trying to keep clear about what it is that I want for the house long-term and avoid the tendency I have sometimes to buy make-it-work stuff when I'm up against deadlines. So far I think we're doing pretty good! Getting the bookshelves in finally will be a big win, for sure. Jason ran the electrical for us this week so we can install the picture lights after the bookshelves come in. It's so funny - every time we open up the drywall I can spy two or three old beer cans from the 80s inside. Those builders really loved their Bud! ha!

 photo cIMG_4488.jpg

Oh, and PS!! Domino named LGN one of their 26 favorite design blogs! There were some old friends and favorites there on the list, and some new-to-me sites that I'm excited to fall in love with too. Check them out!

 photo 0057778756b7c7004f61eef2ac1b846b.jpeg

Monday, May 19, 2014

Bathroom Reno Progress and A New Sputnik

Sometimes I like to jump right in to three or four big projects all at once. I figure that the house is going to be a mess and all covered in construction dust anyway, so why not knock out a few things at the same time? If you follow me on Instagram, you've probably seen my kitchen cabinet upgrade, our new sink and soon-to-be-stripped faucet, and some of our bathroom demo. And hopefully you took a minute to vote on our exterior house color choices. I need to share photos of the front of the house too, which we hired Jason again to help us rework. All the projects are moving at break-neck speed, so we're all feeling a little tired, but excited by the amazing progress on the house in a very short period of time.

 photo IMG_4792.jpg

 photo IMG_4795.jpg

We also hired the same guy who took out our well to help with removing the giant bathtub (his company is called Kyle's Moonlighting and Kyle is pretty much the nicest man in the world - totally recommend him for exterior/interior removal services!).

 photo IMG_4807.jpg

Once we got the tub and the vanity out, we called in some plumbers to get the pipes ready for the new tub and for a single sink vanity.

 photo IMG_5007.jpg

Next, we're tackling tiles. I'm going with one of the tumbling block patterns I posted before I think. Of the two I posted, I'm leaning toward the lighter version peeking out up above and here below:

 photo IMG_4996.jpg

I picked a stone for the sink and I think it will go together beautifully! Can't wait to get going on this install. The floors need to be floated a little though to prep for the tile and to make the bathroom level with the wood floors. (The blue walls are getting a big change this week hopefully too!)

 photo IMG_4991.jpg

Oh, I also wanted to share that I found an amazing vintage sputnik a few weeks back at Modern on Melrose, which is a really fun vintage consignment shop on 7th Ave. It's becoming one of my favorite stores to pop in to - their selection is always well curated and the prices range from very fair to amazingly inexpensive. One of my favorite lamps in the studio (the one on my desk) was only $20 there. If you stop by, be sure to check out the salvage yard area in the back! 

 photo IMG_4603.jpg

 photo IMG_4222.jpg

The brass on the sputnik was not in the best shape, but just a little scrubbing with some soapy water cleaned up the grime and not-so-great-patina.

 photo IMG_4225.jpg

Aren't those "petals" amazing? 

 photo IMG_4229.jpg

 photo cIMG_4233.jpg

We're going to take down that pendant and move the electrical box to be centered over the tub and the window for the sputnik. Won't it be so pretty with the wall of subway tile and the pretty clawfoot tub?!

 photo IMG_4992.jpg

Sometimes fun decorating purchases help me get through the projects phase a little more efficiently! I'm getting anxious to see how it all comes together. :)

Wednesday, May 14, 2014

Florals on Vintage Furniture

Our bookshelves are almost doing being built! I'm so excited to get those installed in about a week! It's got me thinking a lot about furniture in the library. I think I want to float a daybed in front of the bookshelves. Something in a really modern shape would be pretty, I think. I love the simple shape of this one, and that slow curve on the headrest area is pretty much perfection. The legs are sort of weird though, right? A little too utilitarian?

 photo ScreenShot2014-05-13at104837PM.png
These legs are closer to what I'd want to do. This shot was from an eBay listing and above is from 1st Dibs.

 photo ScreenShot2014-05-12at65938PM.png

I'd love to do a button detail on the cushion, but I think there would need to be at least one bolster to make it not feel like an army cot.

 photo resize.jpeg

I've been looking online for something vintage, but I might try making one if nothing great pops up. It would be nice to get to choose the dimensions of the daybed too so it can fit in the library nicely. All the other pieces in the room are upholstered in solid color fabric and the drapes are probably going to be solid too, so I'm thinking the pillows and the daybed cushion would be a great place to have fun with pattern.

I can't stop thinking about how GORGEOUS this chintz looks on this Le Corbusier chair I saw on Sara Kate's instagram. The contrast is so cool and fresh to me! Plus, that fabric is unreal. So, so pretty.

 photo IMG_0464.jpg

Reminds me of this office chair. Unexpected fabrics on classic furniture shapes are really fun.

 photo Picture7-1.png

This little chair makes my heart sing. I would love something like this in one of the girls rooms. :) 

 photo 7562d769f9e220adac78bad2076e7f78.jpg

It would be easy to do just the bolster(s) of the daybed in a floral instead, if the whole cushion would be floral overload. So much of the battle though is finding the right pattern! I have some options in my fabric stash, but I kind of want something new and different. What's your favorite floral pattern right now?

Monday, May 12, 2014

The Studio Bathroom Walls

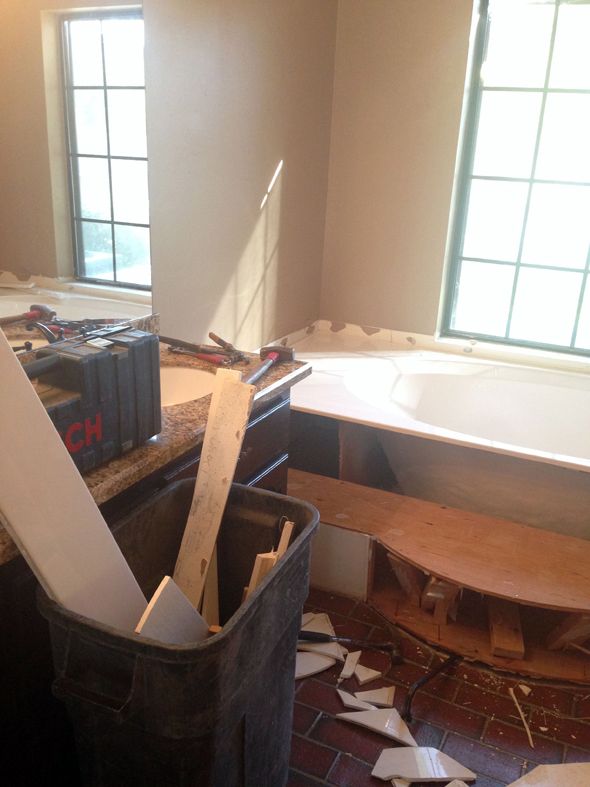
Yesterday I shared how I painted the studio bathroom tile black, which I'll admit, was sort of a big commitment. I wanted the room to feel girlie and fun, but still modern and interesting. It's technically our guest bathroom as well, but since Heather is living with us in the guest room, it's mostly just her and Kate and I that ever are in the space. So basically, I felt like I had free reign to go as girlie as I wanted!

 photo StudioBath4.jpg

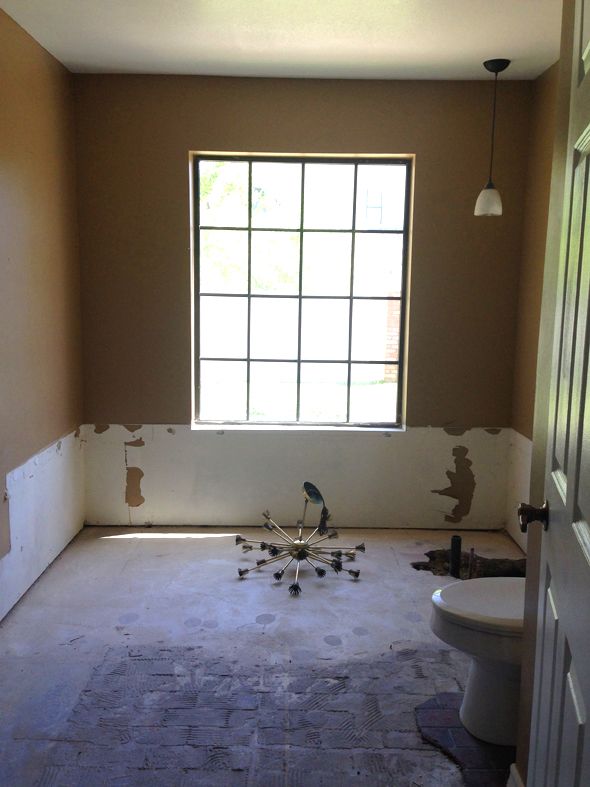
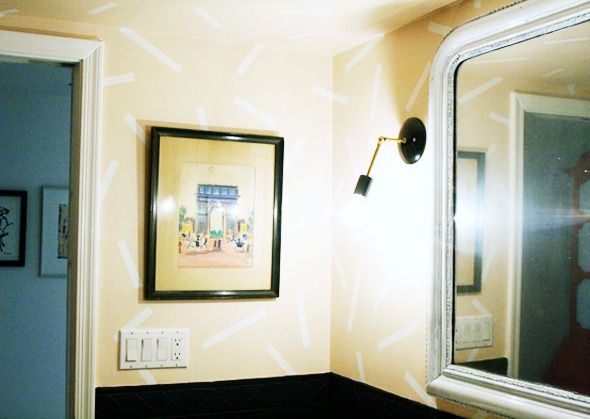
The previously white walls felt really stark in here since the only light source was (and still is) a pair of wall sconces, so I decided to warm up the color and to get a little experimental with a fun pattern.


After swinging by The Home Depot and picking up a few rolls of Scotch Blue Painter's Tape to experiment with, I finally had a lightbulb moment.


 photo StudioBath18.jpg 

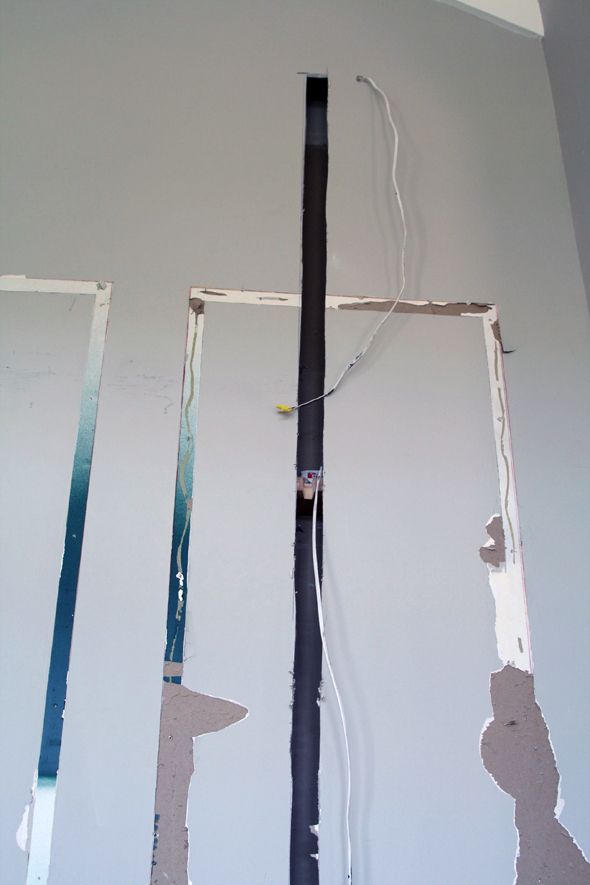
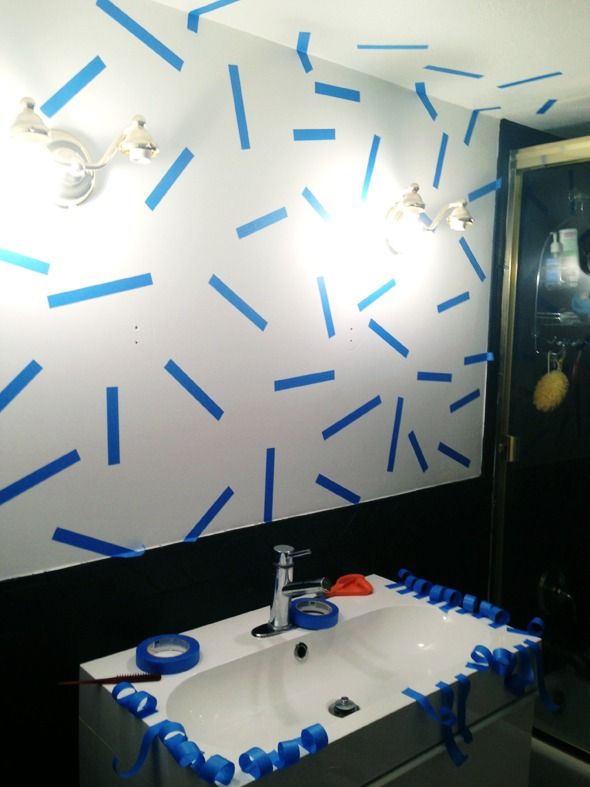
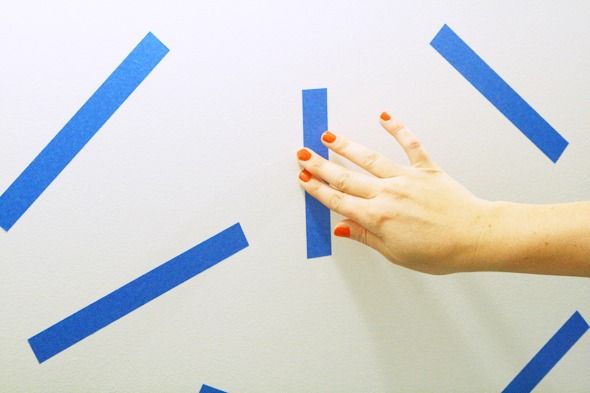
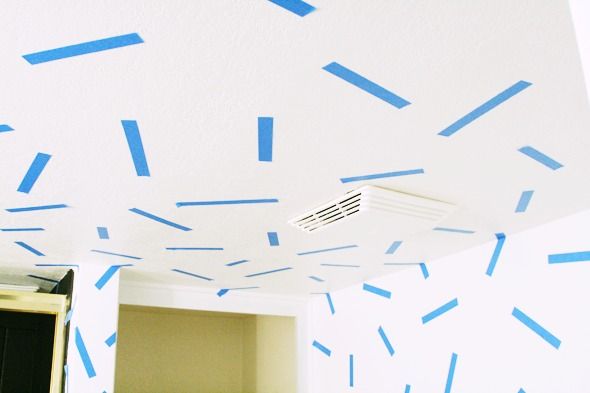
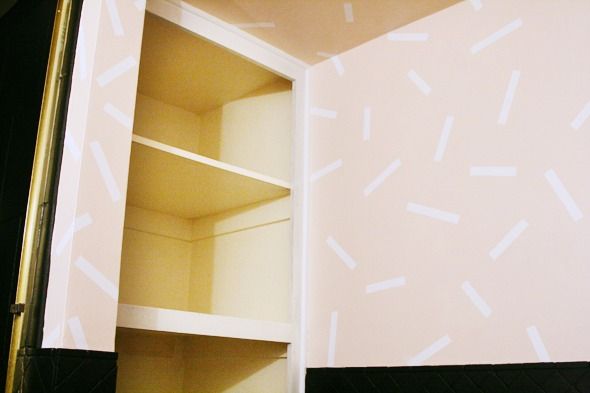
I used a roll of .94" ScotchBlue (it's the Original Multi-Use 2090) to make an abstract line pattern on all the walls above the tile and even on the ceiling. I was inspired by this uber-talented artist that Domino featured in the current issue. He did a similar treatment to the walls in his home using duct tape. I love how these little lines are so simple and they make such a big visual impact.

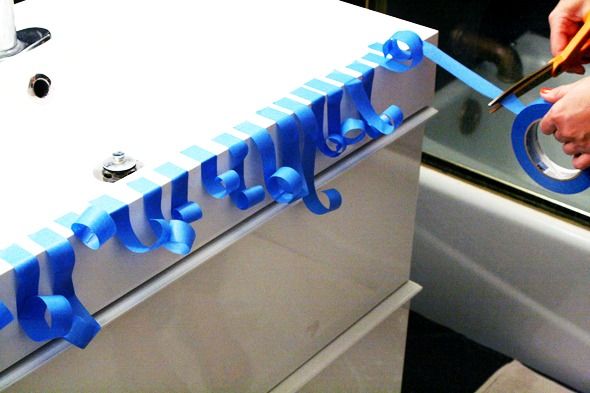
To make a pretty fast process go even faster, I cut the tape (5-7" or so in random lengths) in large batches all at once before applying the strips to the walls.

 photo StudioBath8.jpg

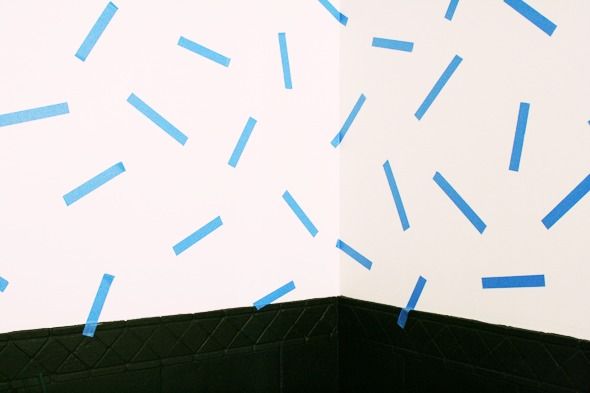
It's easy to make the abstract pattern and it actually looks best if you don't over-think things while you're placing the tape on the walls. 

 photo StudioBath9.jpg

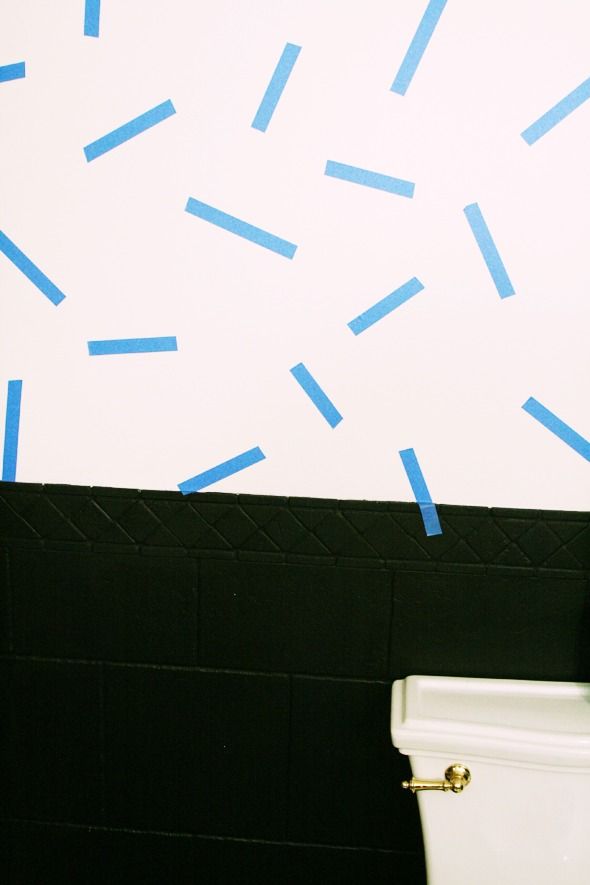
Like with any painting project, it's important to really press down the edges of the ScotchBlue tape before you paint. 

 photo StudioBath1.jpg

Don't forget to let the line continue in and through the corners and be sure to start some pieces below the actual starting line (the tile in my case). This makes the pattern look more like wallpaper.

 photo StudioBath12.jpg

 photo StudioBath11.jpg

We have some slight texture on the wall in some places so I did my little trick of sealing the edges with a quick layer of the base coat before painting the top coat. Works every time!

 photo StudioBath2.jpg

I like to peel the tape off while the paint is still wet. I don't know if that makes any difference in the end result, but it feels like it would, right?

 photo StudioBath3.jpg

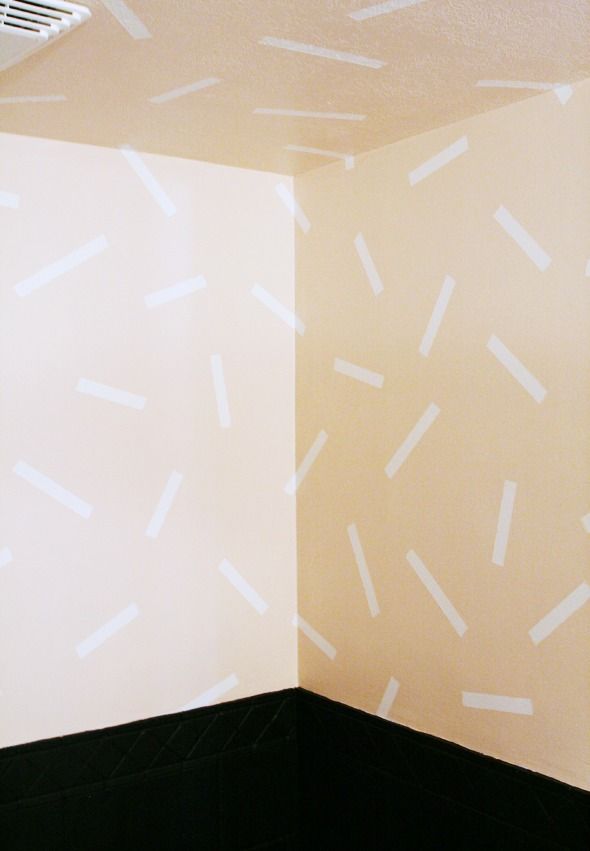
The color we used for the base coat is my favorite white, Benjamin Moore's Chantilly Lace, and the top coat is the prettiest blush color called Spun Sugar by Sherwin Williams (I had both color matched at Home Depot). We don't have any windows in this bathroom, but I'm thinking this color would be gorgeous in natural light. So pretty and soft for a bedroom.

 photo StudioBath13.jpg

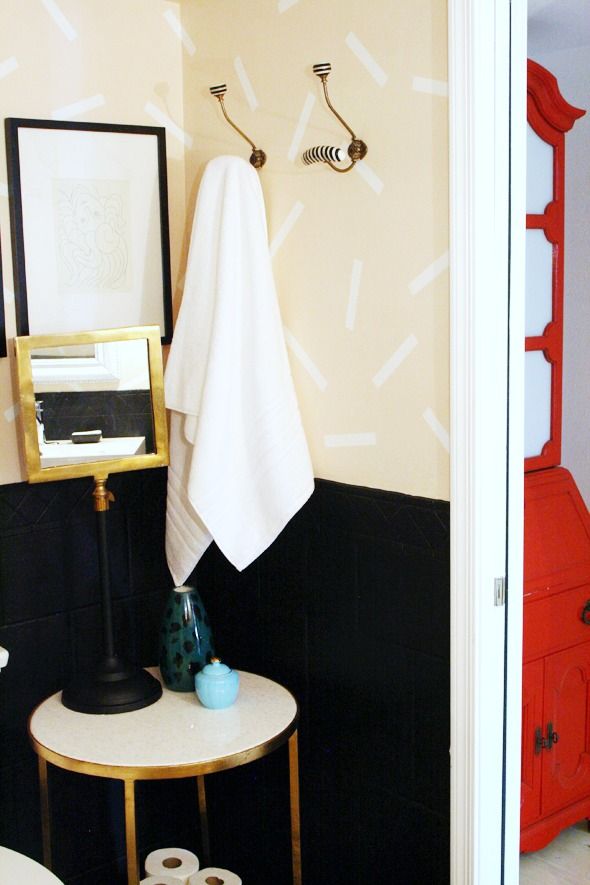
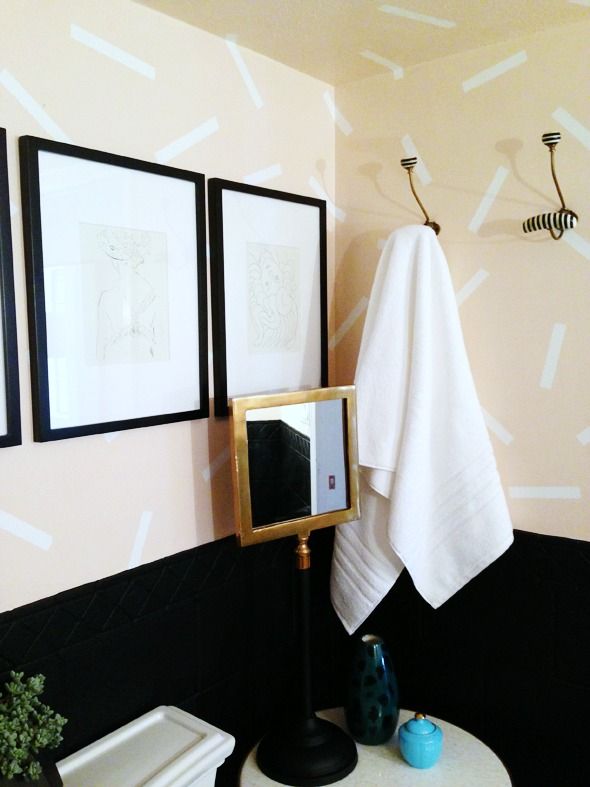
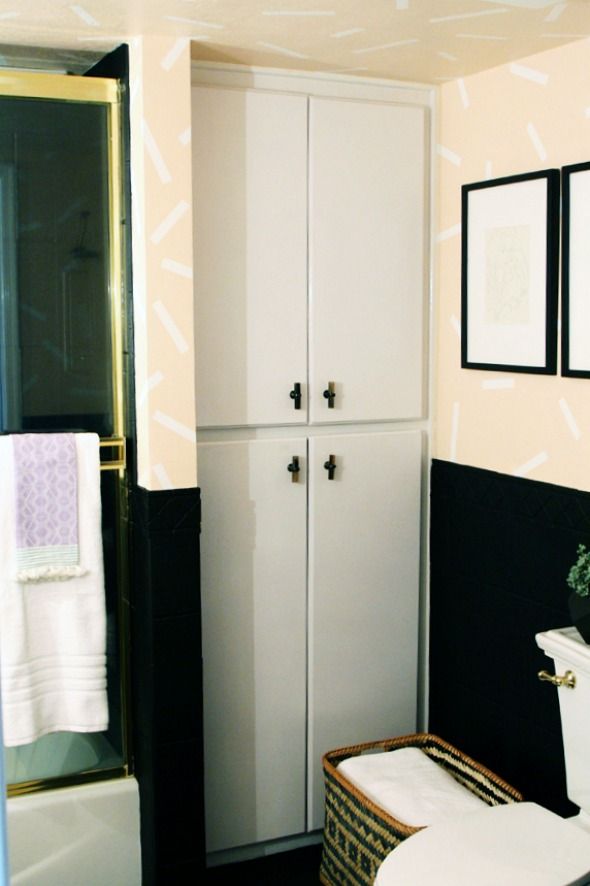
The pattern is playful enough that it would look adorable in a kids room, but when paired with black and brass accents and with lots of art hanging on the walls, the abstract pattern feels modern and cool.


 photo StudioBath25.jpg

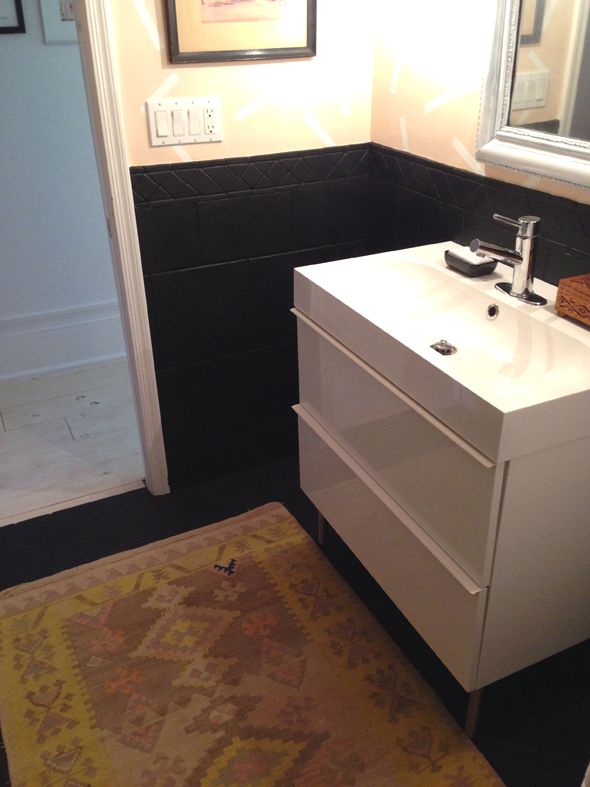
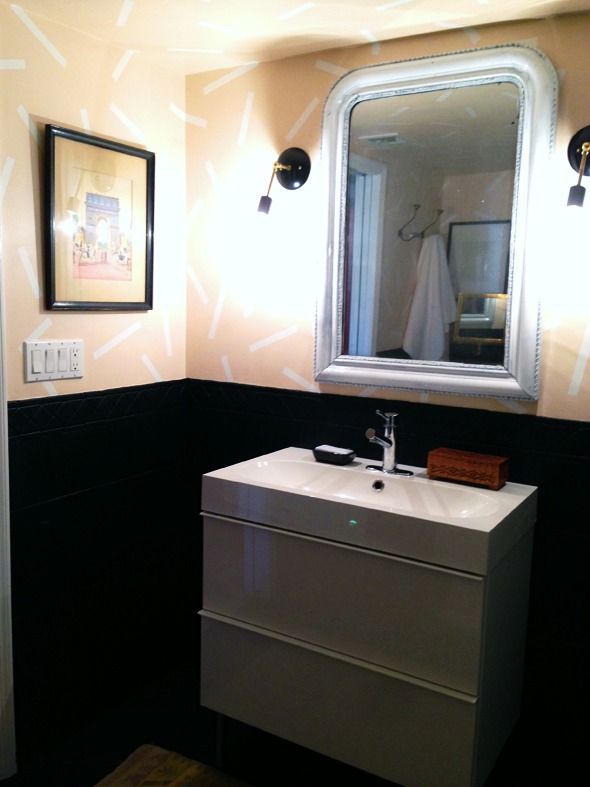
I added lots of white to the room to break up the sea of black tile and to balance out the warmth of the Spun Sugar walls.

 photo StudioBath22.jpg

 photo StudioBath24.jpg


 photo cIMG_3973.jpg

I also came up with a new way to reface old 80s cabinets that I'm really happy with. The basic idea is to use hardboard to create a faux front. I think I'm going to put a twist on the technique for a redo of our kitchen cabinets, so stay tuned for that tutorial!

 photo StudioBath16.jpg

The pretty horn knobs are from Anthropologie. I LOVE them!

 photo StudioBath14.jpg

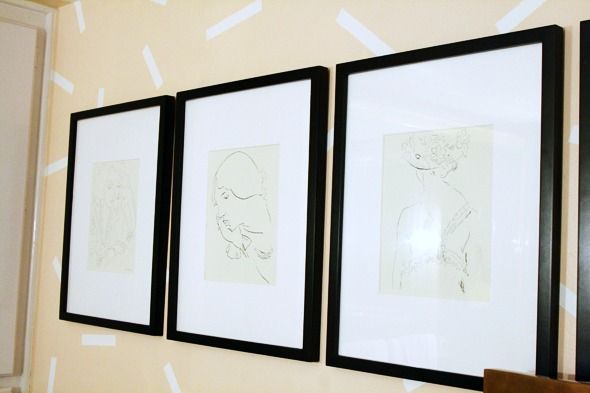
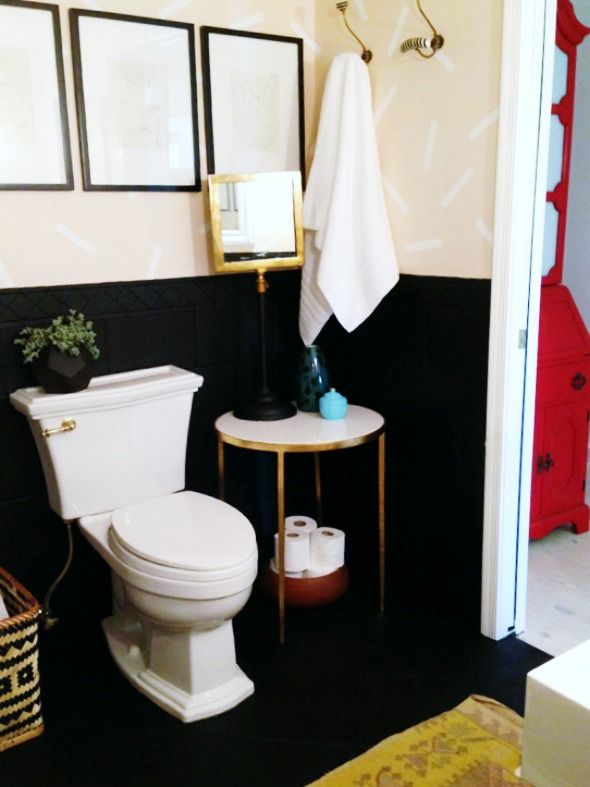
Lots of big artwork helped to brighten this space too. I picked up these frames at Target and I love their extra-wide mats. 

 photo StudioBath15.jpg

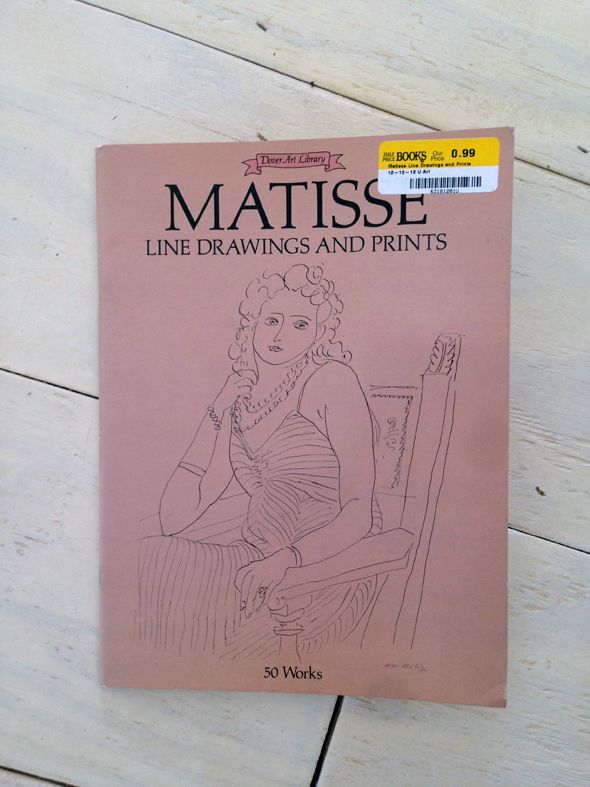
Luckily the mat openings were meant for 8x10 prints and I had just picked up this book of Matisse prints in the same size for just a buck at a used book store.

 photo cIMG_4029.jpg

Doesn't get much more girlie than this right?

 photo StudioBath23.jpg

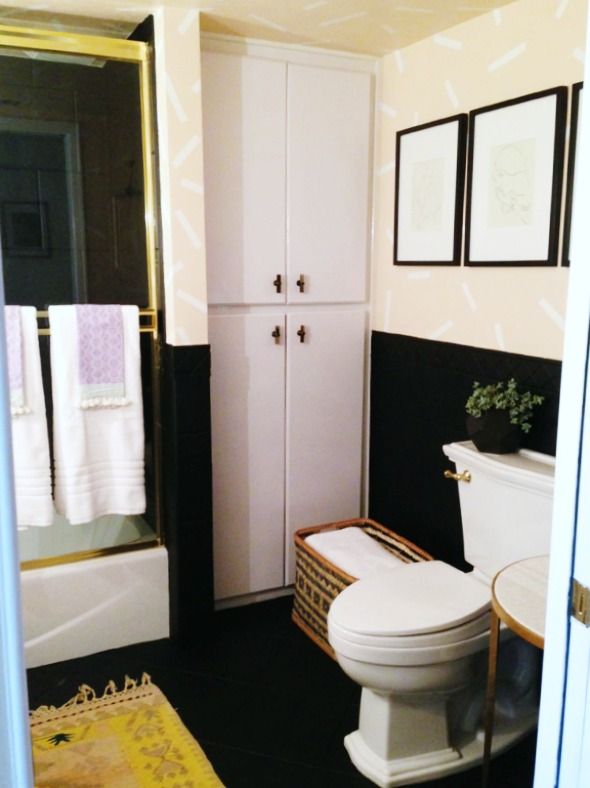
Also did you notice how I moved the Safevieh gold and marble table in here? It fits well and I love the way it looks against the black tile.


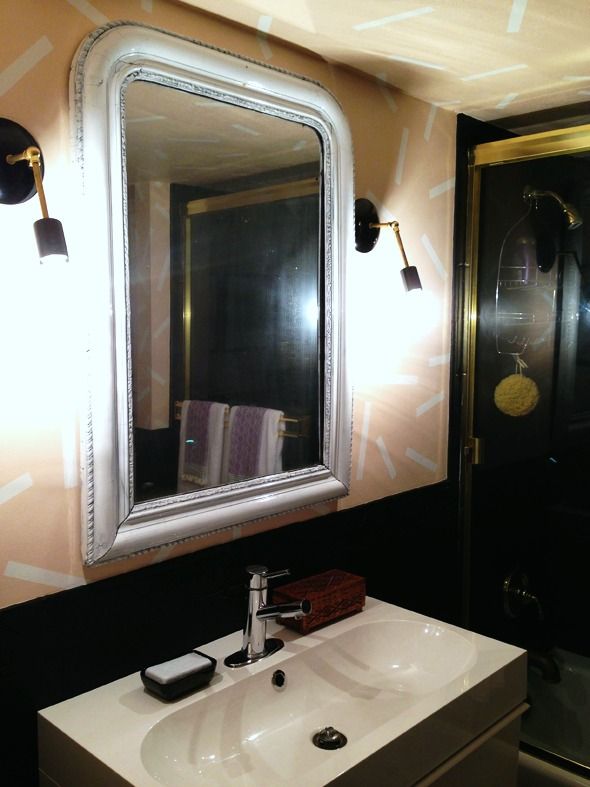
I had to turn down the contrast in this photo so you could see the new sconces. I talked about them here. They're from Triple 7 Recycled on Etsy and they literally could not have been easier to install, especially since the mounting hardware is exposed. I had these babies up in about 20 minutes! I love them and I love the way the light from the exposed bulbs plays on the abstract line pattern on the walls. It's really soft and dreamy in person.

 photo StudioBath5.jpg

 photo StudioBath21.jpg

I'm all for complicated, time-consuming DIY projects (you know I am!), but sometimes simple-and-quick hits the spot, you know? I love the way this one turned out! :) A big thanks to ScotchBlue Painter's Tape for coming through for me yet again. 

(PS Check out their Pinterest page for some really great painting ideas!)

(PPS ScotchBlue™ Painter's Tape gave me a $50 e-giftcard to the Home Depot to share with you readers. Just click here to enter.)

 photo StudioBath19.jpg


Visit ScotchBlue™ Painter’s Tape on FacebookTwitter and Pinterest.
Visit Home Depot on 
FacebookTwitter and Pinterest.

I am proud to be a 3M- sponsored blogger, and, as part of my responsibilities, I get the opportunity to evaluate new products from ScotchBlue™ Painter's Tape. Opinions are my own and additional product used in the project were selected by me.