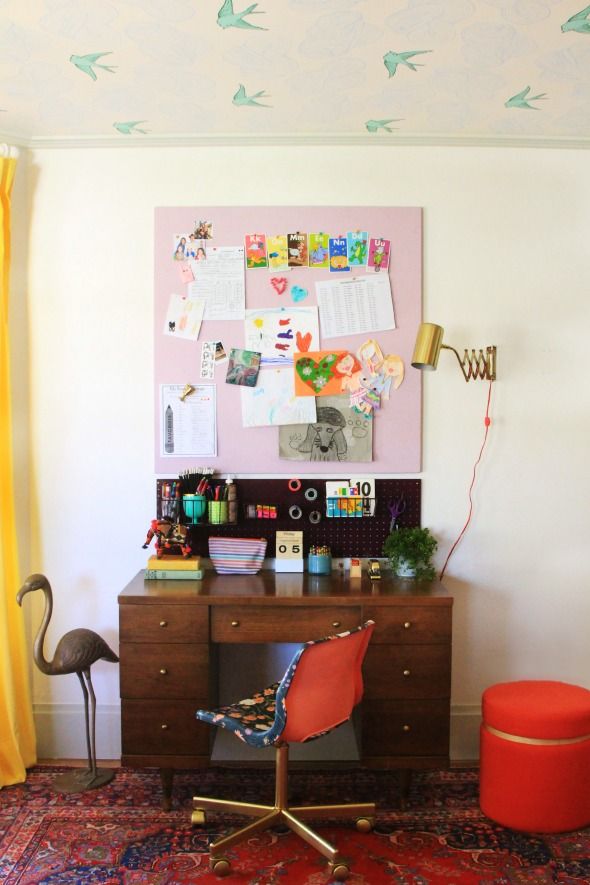
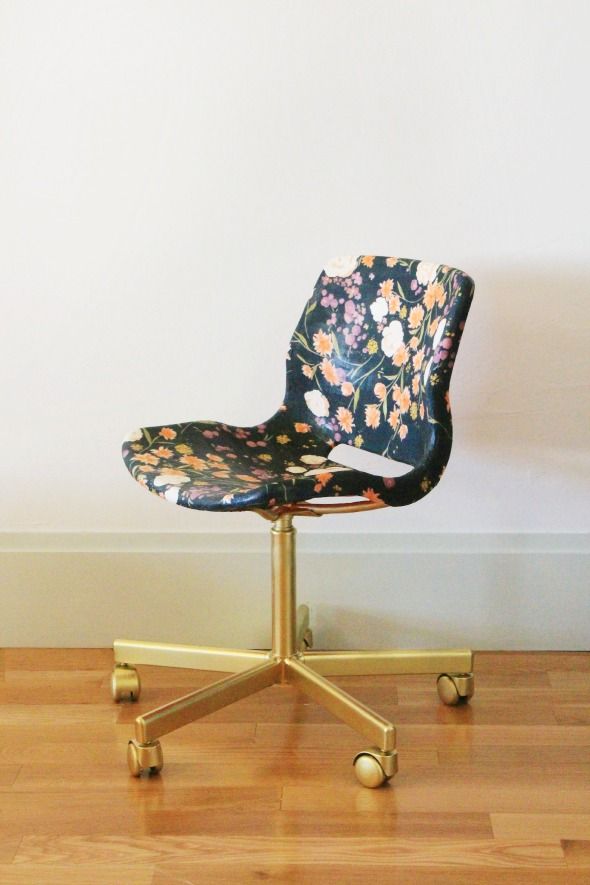
For our little homework station project, I wanted to find a really inexpensive option for the girls' desk chair. I bought the vintage wood desk at a store called Another Man's Junk here in Phoenix and I love it's simple lines, but I wanted the chair to feel a little more fun and youthful. I poked around online trying to find a cheap upholstered office chair to recover in a pretty fabric when I stumbled on these $20 chairs at IKEA. I thought they would be a good candidate for a decoupage project (this one has really stuck in my brain!).
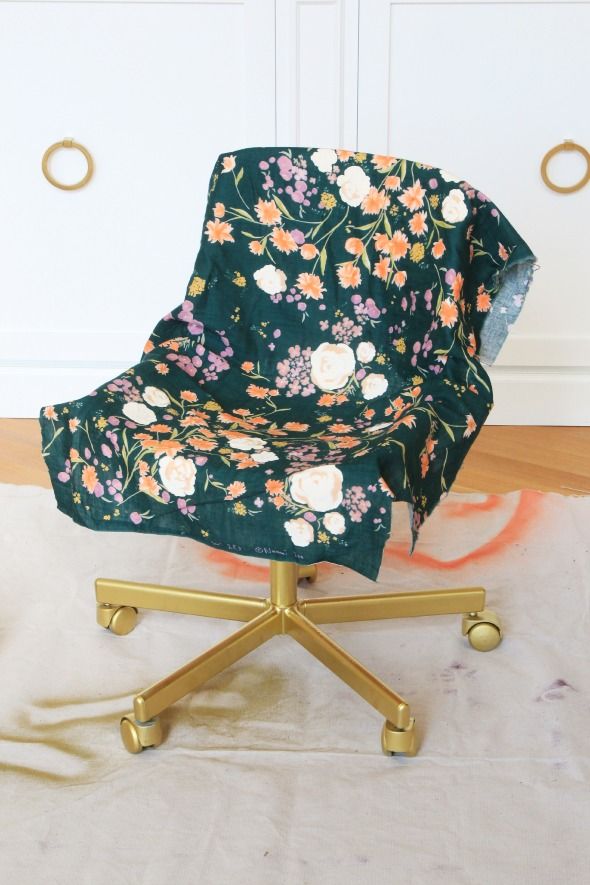
I pulled out some pretty, lightweight cotton fabric from my stash. I had bought several yards of this gauzy cotton Nani Iro for Kokka Fabrics at Purl Soho for a client project a few years ago. We ended up choosing another fabric, so I kept the yardage and I'm so glad I did! It worked perfectly here.
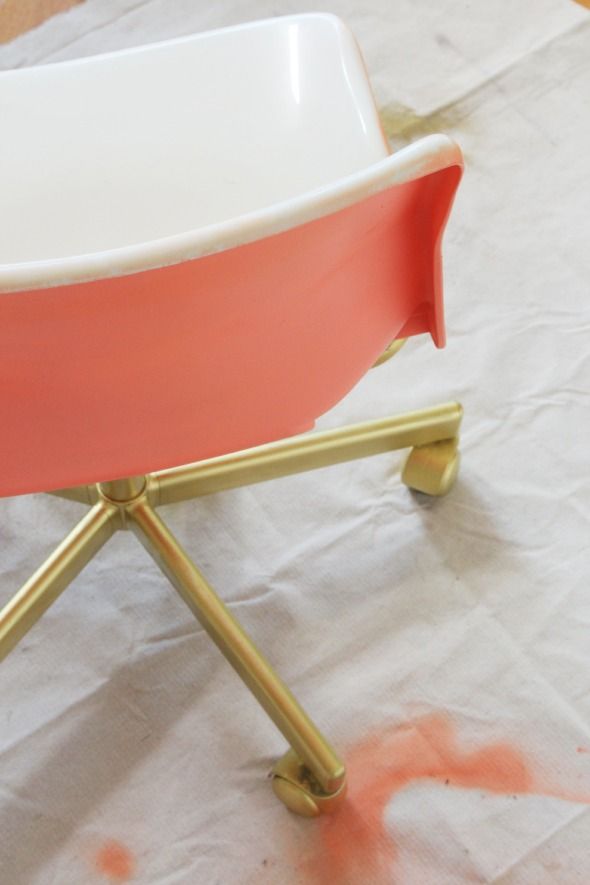
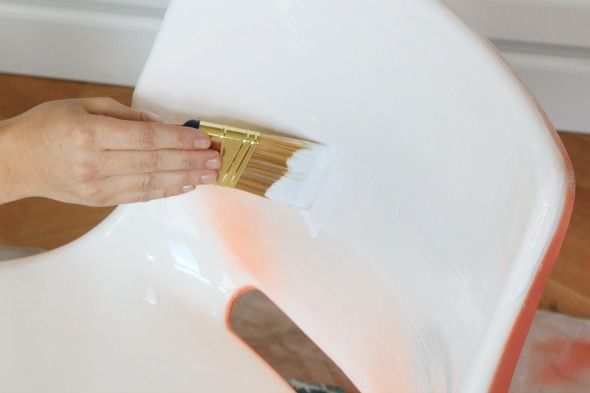
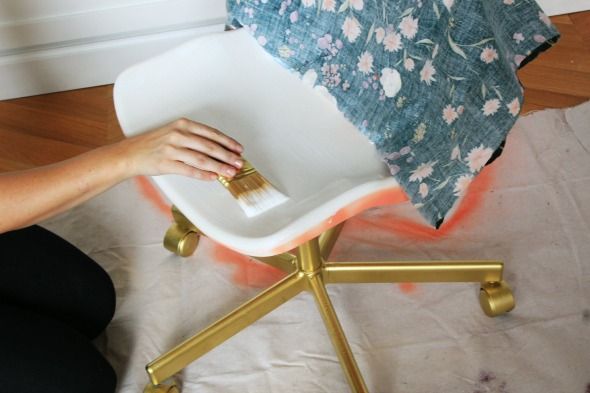
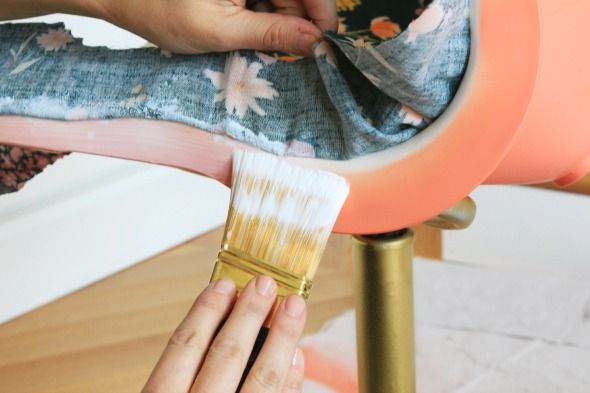
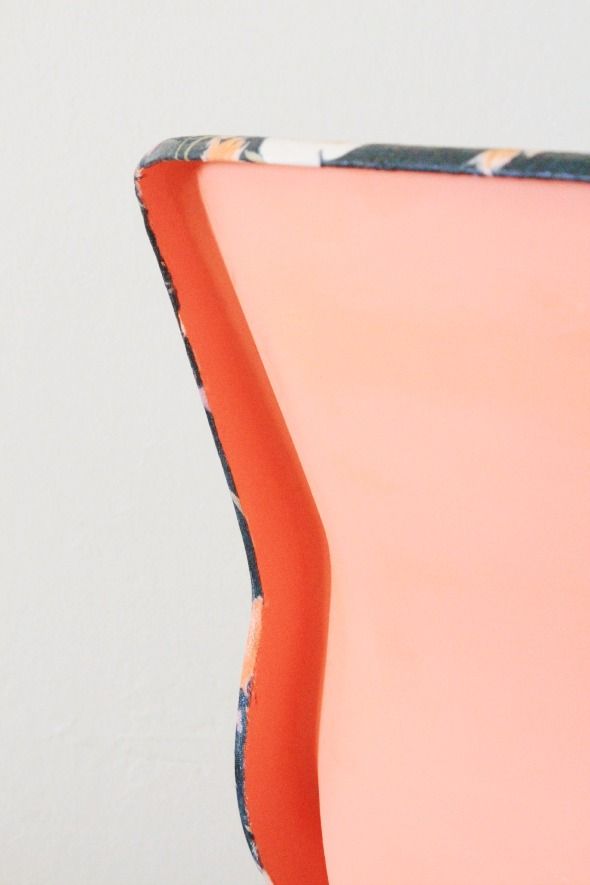
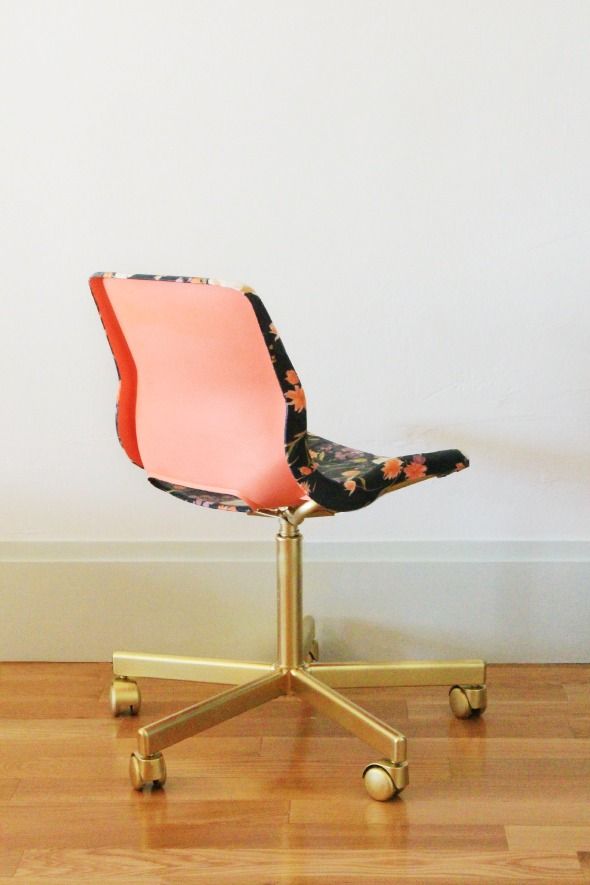
Before we started with the decoupage, we sprayed the chair legs gold with Design Master's Gold Metal and the chair back with a coral spray paint from Krylon which is supposed to work on plastics (and seems to be doing a good job of holding up).
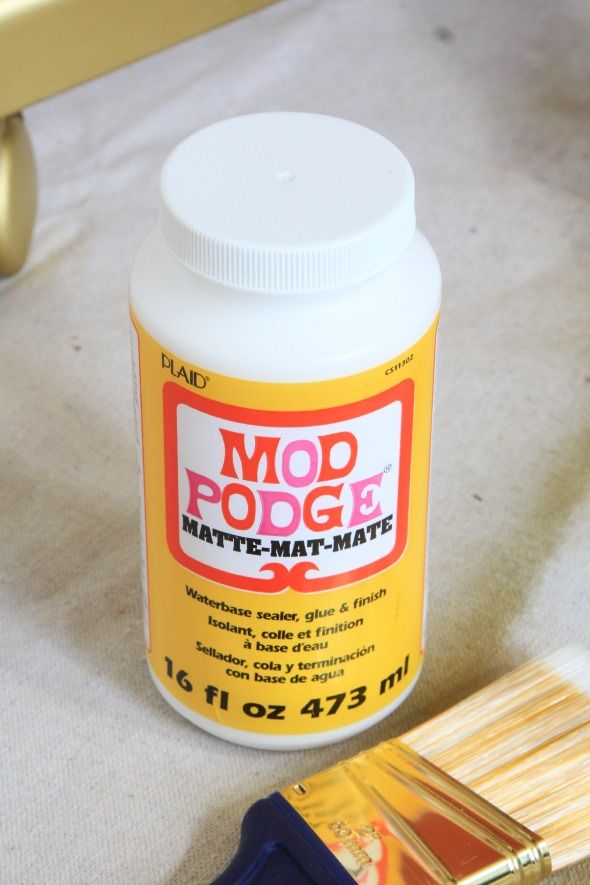
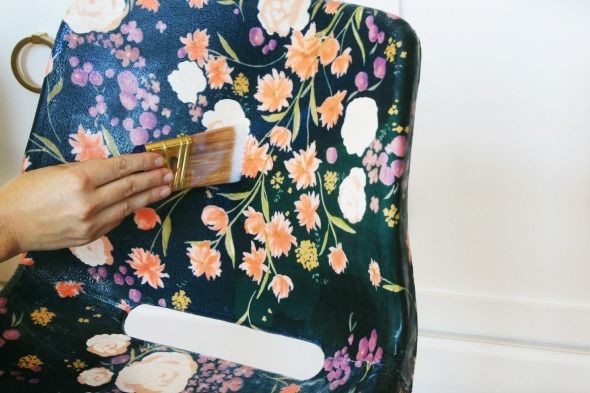
I started by brushing on a pretty generous coat of matte Mod Podge on just the front of the chair back. I left the edges of the seat alone for this part and just worried about the front face.
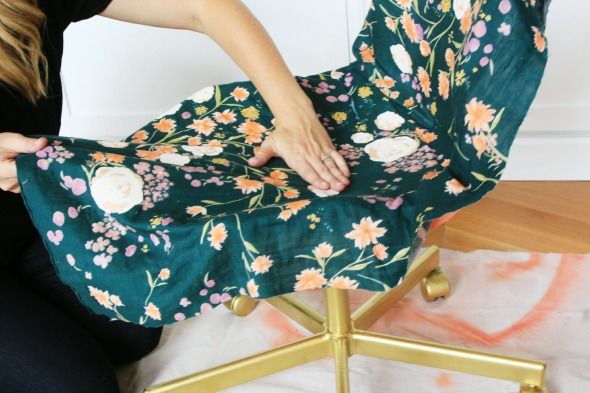
I had figured out the pattern placement and cut out a section of fabric before I started glueing that was several inches bigger than the chair on all sides. I carefully placed the fabric on top of the Mod Podge layer and used my hands to smooth out all the bumps and wrinkles. It takes some work and time, but it's really not all that hard to get a taut, smooth surface with the fabric.
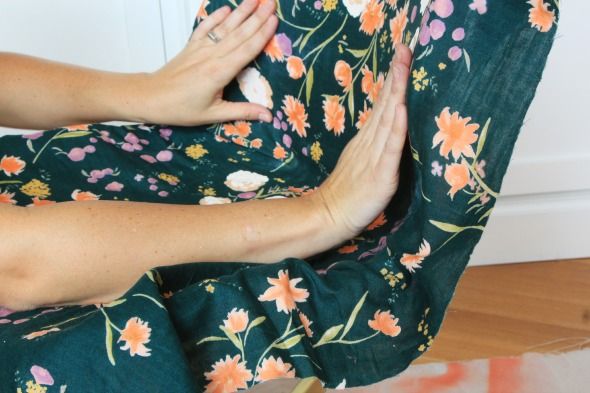
When the upper chair back was smooth, I repeated the same process on the chair seat. Again, I left the edges dry at this point and worried just about the big surfaces.
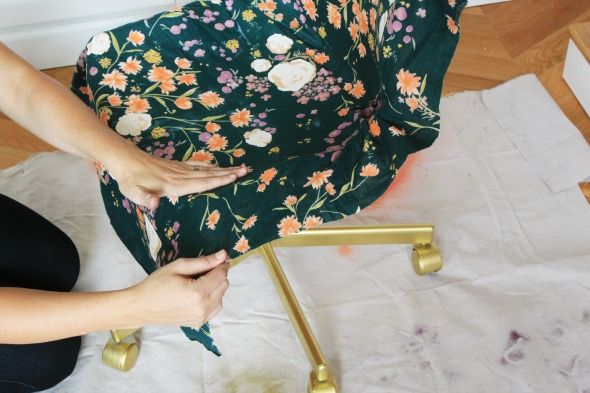
If you do this project using the same IKEA chair, you'll want to leave just a bit of fabric bunched around the curve of the seat (where the little hole in the back is).
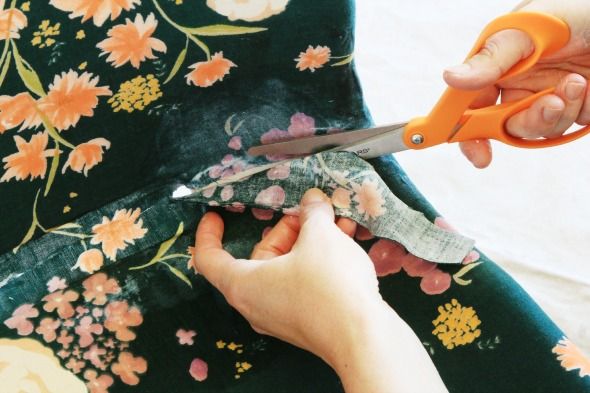
Once the seat and the seat back were all smooth, I trimmed the excess fabric a bit more, just to make things more manageable, and then I brushed Mod Podge onto the face of the edges and started the same process of smoothing.
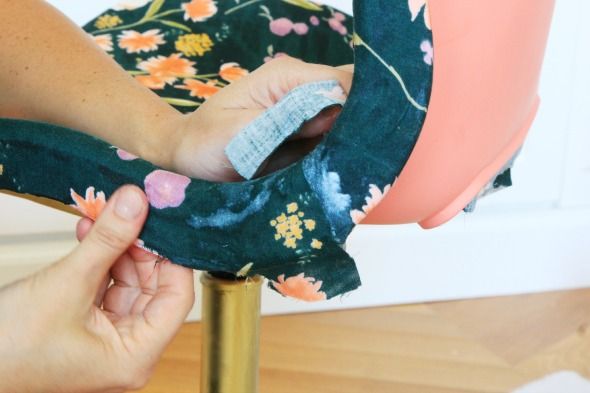
The corners and curves are really the only tricky part. I cut out some of the extra fabric in a triangle shape until the fabric sat perfectly smooth around the corner edge and then I glued it down with Mod Podge.

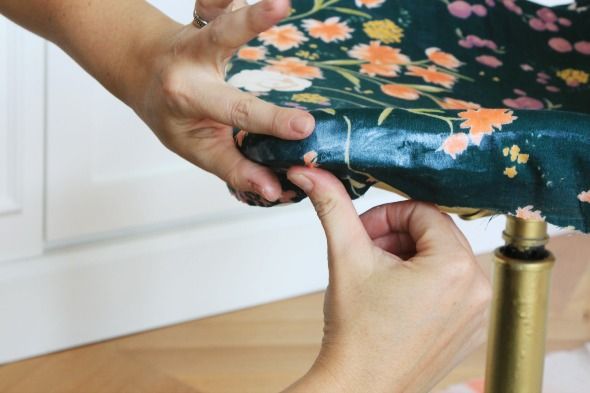
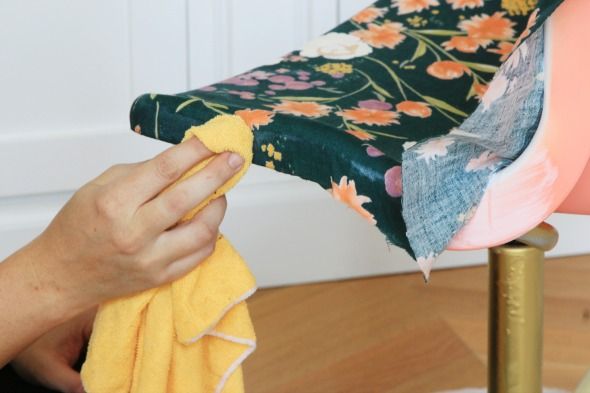
A damp cloth really helps smooth everything down and was a big help with the edges especially.
I cut away more fabric for the curve and the hole in the back of the chair before gluing the fabric down. Mod Podge is so easy to work with. It is so forgiving and can be repositioned for a long time.
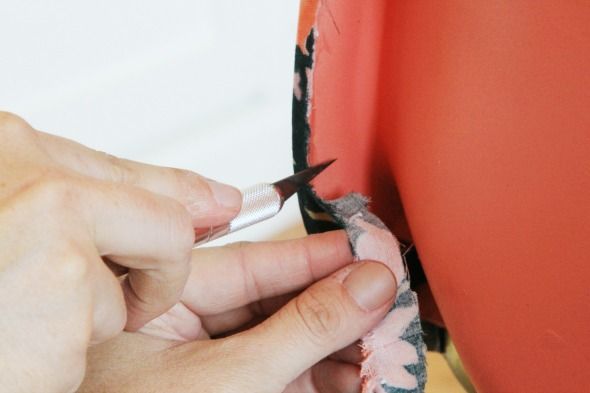
Once the Mod Podge had dried (about an hour or two later), I ran an X-acto knife down the inside edge of the back. And then I brush on another little bit of Mod Podge along the edge to help seal the fabric and prevent fraying.
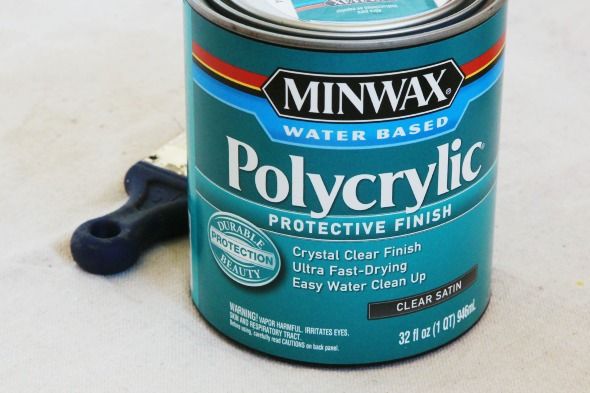
Once the whole chair was done and dry, I brushed on two thick coats of satin Polycrylic sealer on top of the fabric. This changed the look and feel of the fabric a bit - it sort of looks like laminated fabric now, or like the chair is made from a textured, printed plastic maybe? But the surface is solid and waterproof and easy to clean now, so I'm cool with it.
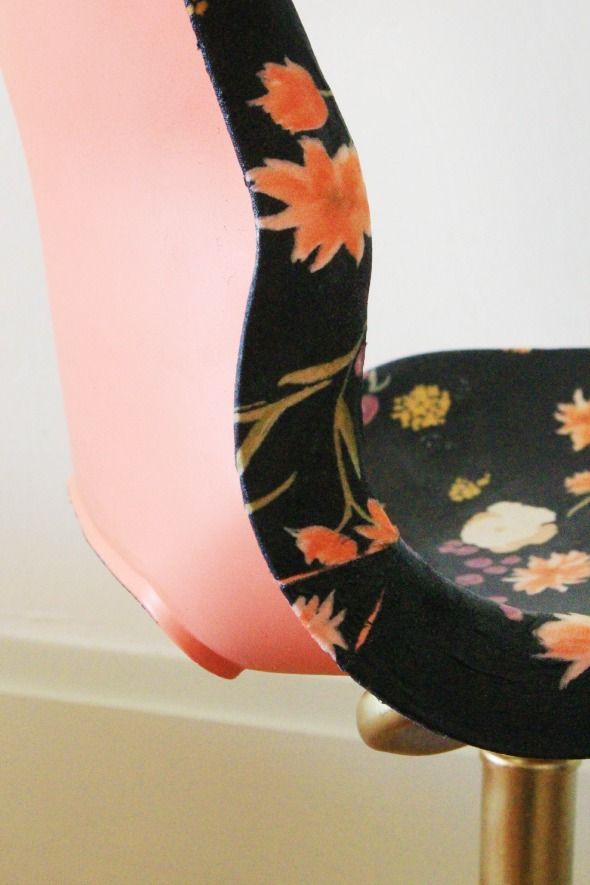
Still pretty cute, right? I love how it looks from the back especially, with the pop of coral!
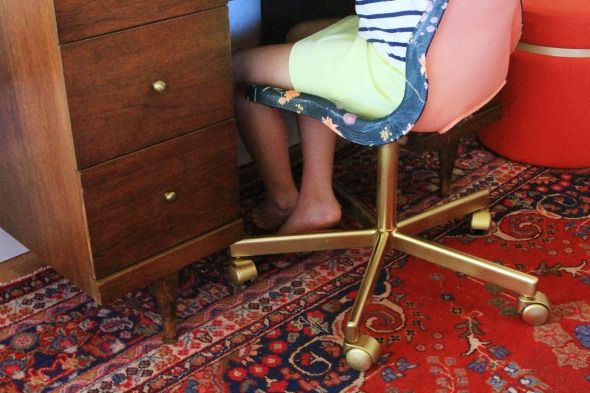
It feels pretty indestructible and my girls love it. Win-win. :)

No comments:
Post a Comment