Wednesday, October 31, 2012

DIY Coral Velvet Bed

I finished reupholstering our old bed frame right before we moved out of the loft, and I still really love it.


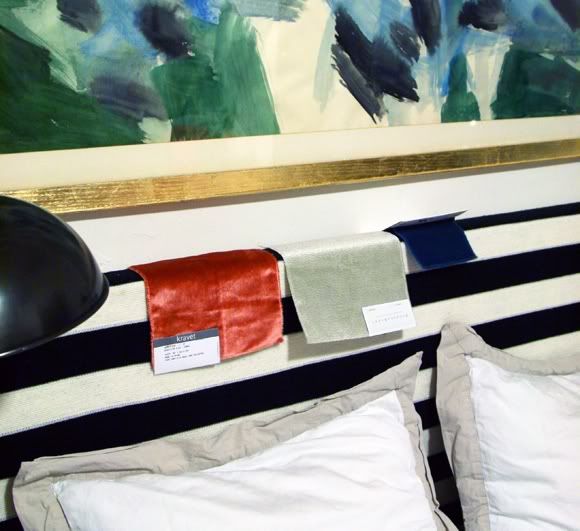
Remember how I was trying to figure out what fabric to use? I thought a lot about the color...


I was leaning toward this pretty silk velvet from Kravet, but it was pricey (like, very pricey), but I loved the color and sheen.


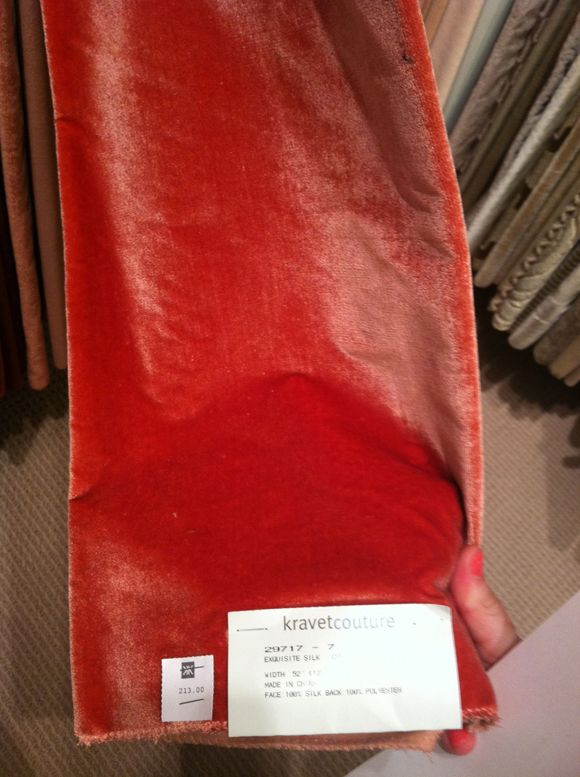
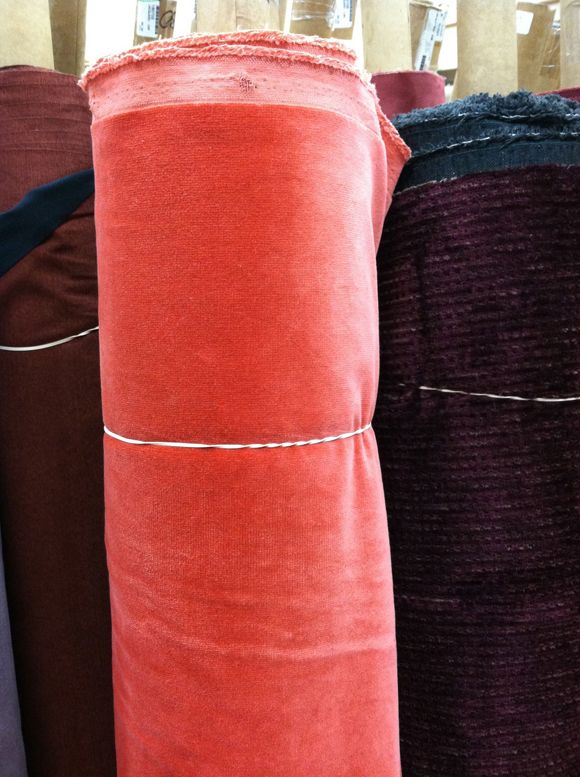
Then I stumbled across this really pretty cotton velvet when we were in Arizona this summer, for only $13 a yard at Home Fabrics in Mesa. I bought six yards and had to carry it on with me on the plane right home -- it was so heavy! (and I had too many Last Chance finds stuffed in my suitcase)


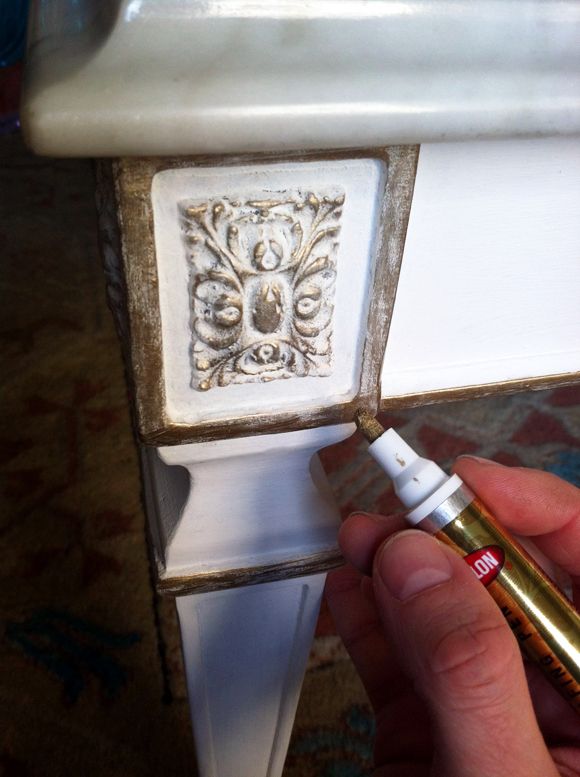
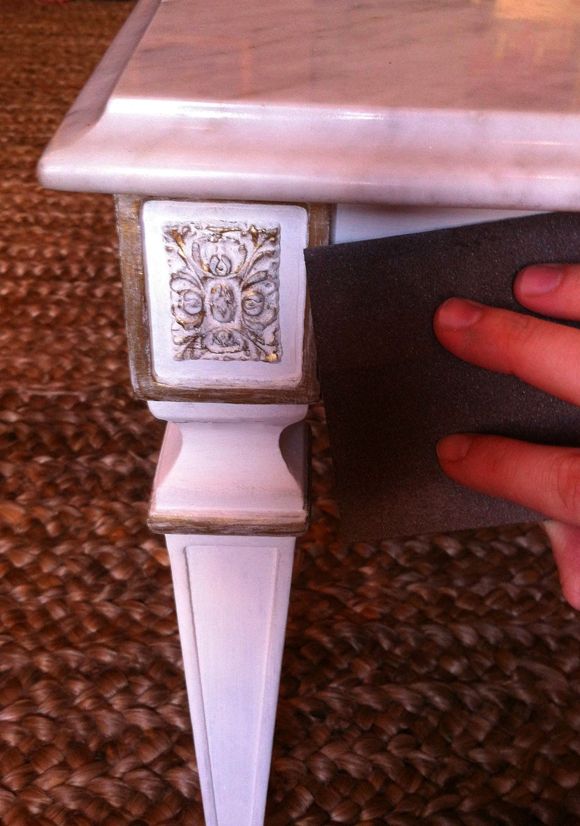
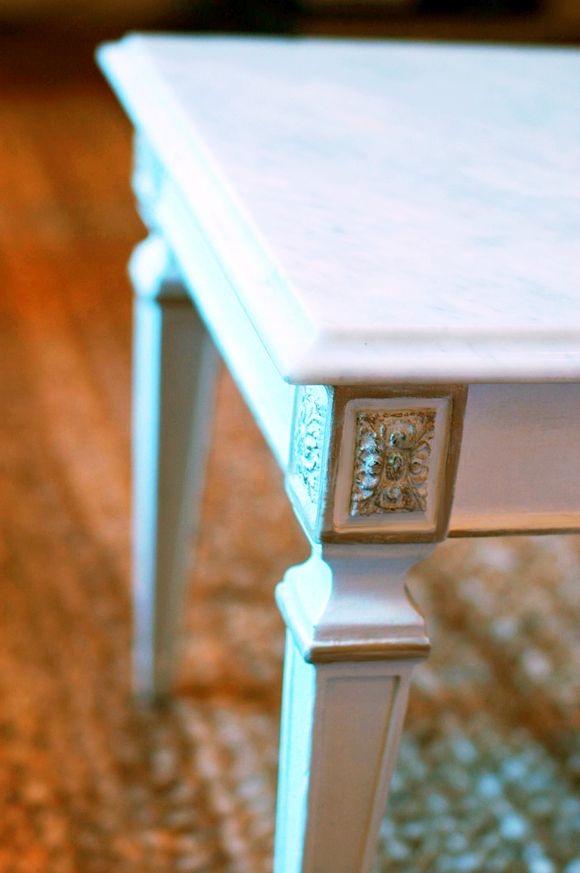
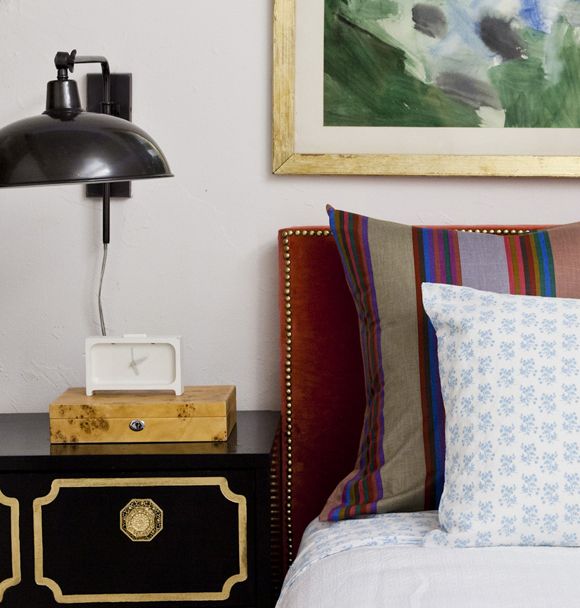
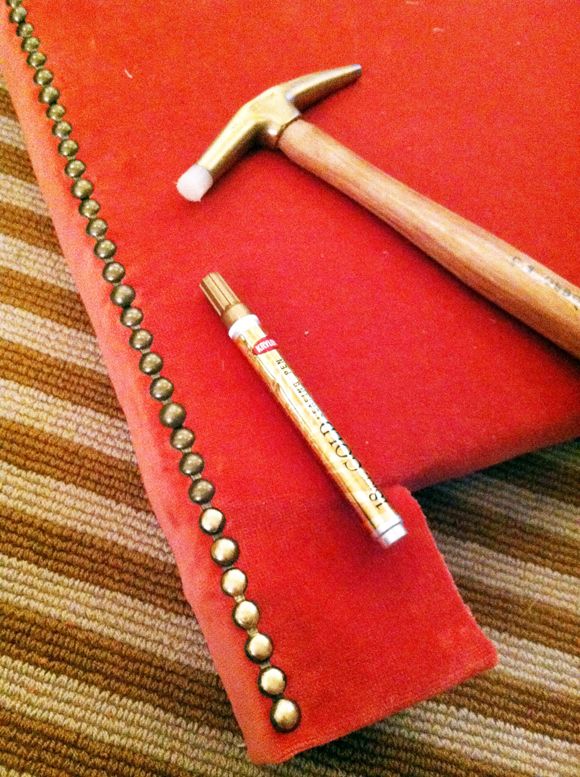
I used this basic approach to the upholstery process after pulling off the old fabric, but I actually removed some of the footboard so that it would be easy to climb over in our small room. I also used the same nailhead trim roll. This time, after tapping in the nailhead strips, I quickly colored over the nailheads with my gold leaf pen. (see how bright the bottom few are here?) The key is to not color too perfectly. A messy job looks more real.


I'm in love with how low the head and footboards are - it feels more modern to me. The top of the headboard is about 38" high. It's nice because my head sort of rests on the top edge when I'm reading in bed and my back can be supported by the euros and standard shams. It's really comfortable.


And, hey, do you recognize the pillow fabric? I wish I had a 100 yards of that vintage stripe.


PS In case you are struggling with the corners of a piece like this, I did the reverse approach I shared in this project. Corner strip first, edge pieces last.


PPS More photos of how this bed used to look a couple years ago HERE (including a folding screen DIY)

Tuesday, October 30, 2012

Post-Sandy Report


Finding this lovely photo on my phone was a surprise. I think Grace was impressed with the gorgeous sunset and felt the need to document it. :) 

Hi friends! The hurricane blew through here, and we're still safe. Things have been a little crazy as you can imagine. We are housing out-of-town guests as wells as family who were evacuated from the flood zones in Manhattan, so at least we have lots of great company at the brownstone! It's looking like it will be several more days before the city will be up and running again. I'm hoping we'll have internet tomorrow though and I'll be back to posting like regular.

How did you fellow east-coasters fare? It's been heart-breaking to see so much destruction to our friends homes and apartment buildings. We're feeling lucky nothing major happened to us. 

Friday, October 26, 2012

20x200 Give Away - Six More Winners!

I realized I had been putting off hanging art in our living room for weeks and weeks because I wanted the gallery wall in there to be perfect. But this month, we've have a ton of house guests, so it pushed me to hang some art sooner. It never ceases to amaze me how hanging art makes a home feel personal and alive.


I like how the line of the staircase breaks up the arrangement. Those stairs are not cute to me (more on that later - ugh), so I feel like this is a making lemons out of lemonade sort of thing. 


These are my favorites from 20x200 (who is offering up SIX gift certificates today!). I've got my eye on a few of these below. They are available in several different sizes, so I'm thinking about an over-sized print for another wall in the living room (which I think would help balance the gallery wall).

This one might be my favorite of the bunch here.

I always liked this book series, but I recently noticed one of the prints hanging in the 5th Ave. J. Crew, and the colors and the texture are unbelievable in person. Definitely on my wish list now.

I'm intrigued by everything Iceland has to offer. HERE

Oh, the colors! HERE

I'm picturing this blown up very large with a simple black or oxblood red frame. HERE.

Oh, Christian Chaize, I just can't quit you.

A little geometry helps to break up any gallery wall. HERE.

Horses are such lovely, emotional creatures. Don't you agree they make for amazing art subjects?


I buy fabric on this street almost every week. HERE

I love how pretty these balloons look in the morning light, but also I feel like they probably saw some stuff go down the night before, yeah? HERE.


This prettymap series is clever. Is your city available?


I like how this print is sweet, but the double image keeps it from going into precious territory.

I can't put my finger on why this one is so arresting for me. HERE.


This artist photographs images, prints them out and manipulates them to create a new image and photographs the result. So cool.

I grew up in a place where fog didn't really happen, so every time I come across a mist in the morning, I can't help but be fascinated. It's so dreamlike. HERE.

The 20x200 site is jam-packed full of lovely, thoughtfully curated art prints. With the holidays right around the corner, I know I'll be doing a little shopping for friends and family. I love that I have so many price options since most of the 8x10 sized prints start around $20.

If you'd like a chance to win the $200 gift certificate or one of the five $20 gift certificates, please look a little around their site, choose your favorites, and leave a comment with a links on this post.

Contest closes Friday, November 2 at midnight. The winners will be chosen randomly and emailed - so please be sure to sign in or leave your contact info in the comment. Good luck! 

Thursday, October 25, 2012

Vintage Lounge Chairs


My sister's in town and I was so happy to have her company for a last minute working road trip. We stopped to do some antiquing - and look what I found today!


These vintage wire lounge chairs have so much potential and they were a steal. I'm so glad I switched my balcony plans at the last minute and went with these Blu Dot chairs for around the table. These loungers will sit in a pair on the other end of the balcony. Maybe the faux bois side table between them?


I'm not a fan of the ecru paint color. It's chipping and rusted over a bit anyway, so I'm thinking I'll strip these down and see what I've got to work with. I'm sort of hoping I can leave the metal unpainted. (maybe just sealed to prevent rusting?).


I'm already brainstorming cushion designs. I have a really fun one in mind. I just need to do a little research on the type of foam/fill I need to buy for outdoor use. Have you ever made your own outdoor cushions?

Wednesday, October 24, 2012

New Balcony Chairs from Fab

Good news! I am working on a zinc table DIY for our balcony that I'm really excited about. Since I'm saving about $500 on that project, I felt okay about spending a little more on chairs.

I had plans to buy four vintage Bertoia chairs (or this new version), but it's true they aren't the most comfortable chairs out there (especially without the chair pads). So I decided to nix the idea, mostly because I thought something more on the solid side would look better with the tumbling block floor pattern.


I've always loved Blu Dot furniture (Jenna Lyons' pink desk is such a favorite.) And while I might have not picked these chairs on their own, the modern lines mix so well with traditional and other vintage styles. I can't wait to pair them with my zinc table.

Fab had the Blue Dot chairs on sale for about the same price as the Bertoia knock-offs I had been considering before. One of my friends has these on her balcony and they made for a very comfortable long dinner party. And of course, I'm crazy over the red color (though they come in other colors too if you're looking for something similar).


Even though I purchased the chairs myself, Fab is a sponsor of LGN and I'm happy to share some of the great products available on the site today. The Fab site is super fast-moving (the sales last 3-7 days) so when this stuff is gone, it's gone. A sad lesson I learned this week when the kantha quilt I loved sold. Never wait when it's true love! :) Luckily, there are plenty of beautiful quilts left here.


1  //  2  //  3  //  4  //  5  //  6  //  7  //  8


9  //  10  //  11  //  12  //  13  //  14  //  15

Tuesday, October 23, 2012

Moulding: Going All Out?

You guys, I must be a glutton for punishment. Just as I'm reaching the home stretch for finishing the crown moulding on the parlor level, I start dreaming of trimming out the rest of the walls. Like, top to bottom moulding.


Looking at the room they shot the West Elm Branch floor lamp in, did not help. (which, PS I really want that lamp!)


I think it would be easier to DIY this type of trim that lays flat on the wall. Crown moulding is such a beast!

Have you attempted anything like this? Maybe I'll just try it in the dining room and stop there if it's too much work/money. I'm especially drawn to the way the moulding and walls are painted that only makes the moulding look chunkier.

Monday, October 22, 2012

Coffee Table Makeover

I'm slowly but surely chipping away at the project list for the living room. For the most part we didn't use a coffee table in the loft and we really missed having one.


So remember this vintage coffee table? In the loft, we used the marble top on our kitchen island (both incarnations). I kept the fruitwood base, thinking I would use it to make a foot-of-the-bed bench, but I liked the marble in our living room, so the frame and marble top were joined together again...


I knew the wood would have to be painted out though - it was not pretty up close. I thought about doing a gray shade, but the room really needs more white, especially for when the sofa fabric gets changed to a darker color.


I remembered seeing this Christine side table from Oly Studio with a client and I love the painted and gilded finish. I especially liked that the gilding was a little worn and not so new looking. 


I didn't want to do an antiqued white paint though, but I did want it to look chalky and very matte, so I knew I wouldn't spray it. I had a tupperware of the flat paint that was on our walls in the loft. It is a very soft, creamy white, with some gray undertones. I think it's BM's Arctic White.


I sanded the old finish just enough to sort of rough up the surface and then I dry-brushed a base coat.


I lightly sanded again - it goes really fast with those handy little sanding blocks. I use them way more often than my electric hand-sander for light jobs like this because I feel like I have more control.


Then I did another dry coat. Sometimes, if my paint is a little on the dry side or my brush is not perfectly new, I'll get more brush strokes than I want and that's why dry brushing works well. For the final coat it works well to sort of quickly beat the barely wet brush on the surface. It makes for a soft, burnished finish.


To make the finish look more like the Oly table, I used my favorite Krylon gold leaf pen to lightly draw on some faux gilding.


To make it look a little more beat up and not so new, I lightly sanded the gold, too.


I thought about gilding down the ridges of the legs too, but I think it would have been overboard. I might go back and add it later though, once I lay down the new rug I've been working on.


Along with the rug I'll layer on top of the jute, I have plans to reupholster the green chairs and the vintage sofa and to change out the pillows.


I also really need to add a window treatment. I think I'll make three roman shades in a medium gray color and layer those under curtains in a shade close to the wall color (which is all washed out here). The goal is to sort of hide most of the unfortunately placed a/c unit.


Lots to do still, but it feels good to be steadily knocking out the projects. :)